Open the order management via:
Navigation bar → Orders → Manage Orders
Note: The exact labels of the menu items may differ depending on the configuration of your LDB.
The following describes the functions for managing orders in the LDB.
The order is the central hub of the LDB – this is where all related data is collected and linked together:
How order, sample, result and report are connected:
Order management lets you:
The orders are shown in a tabular overview. The following table describes the columns.
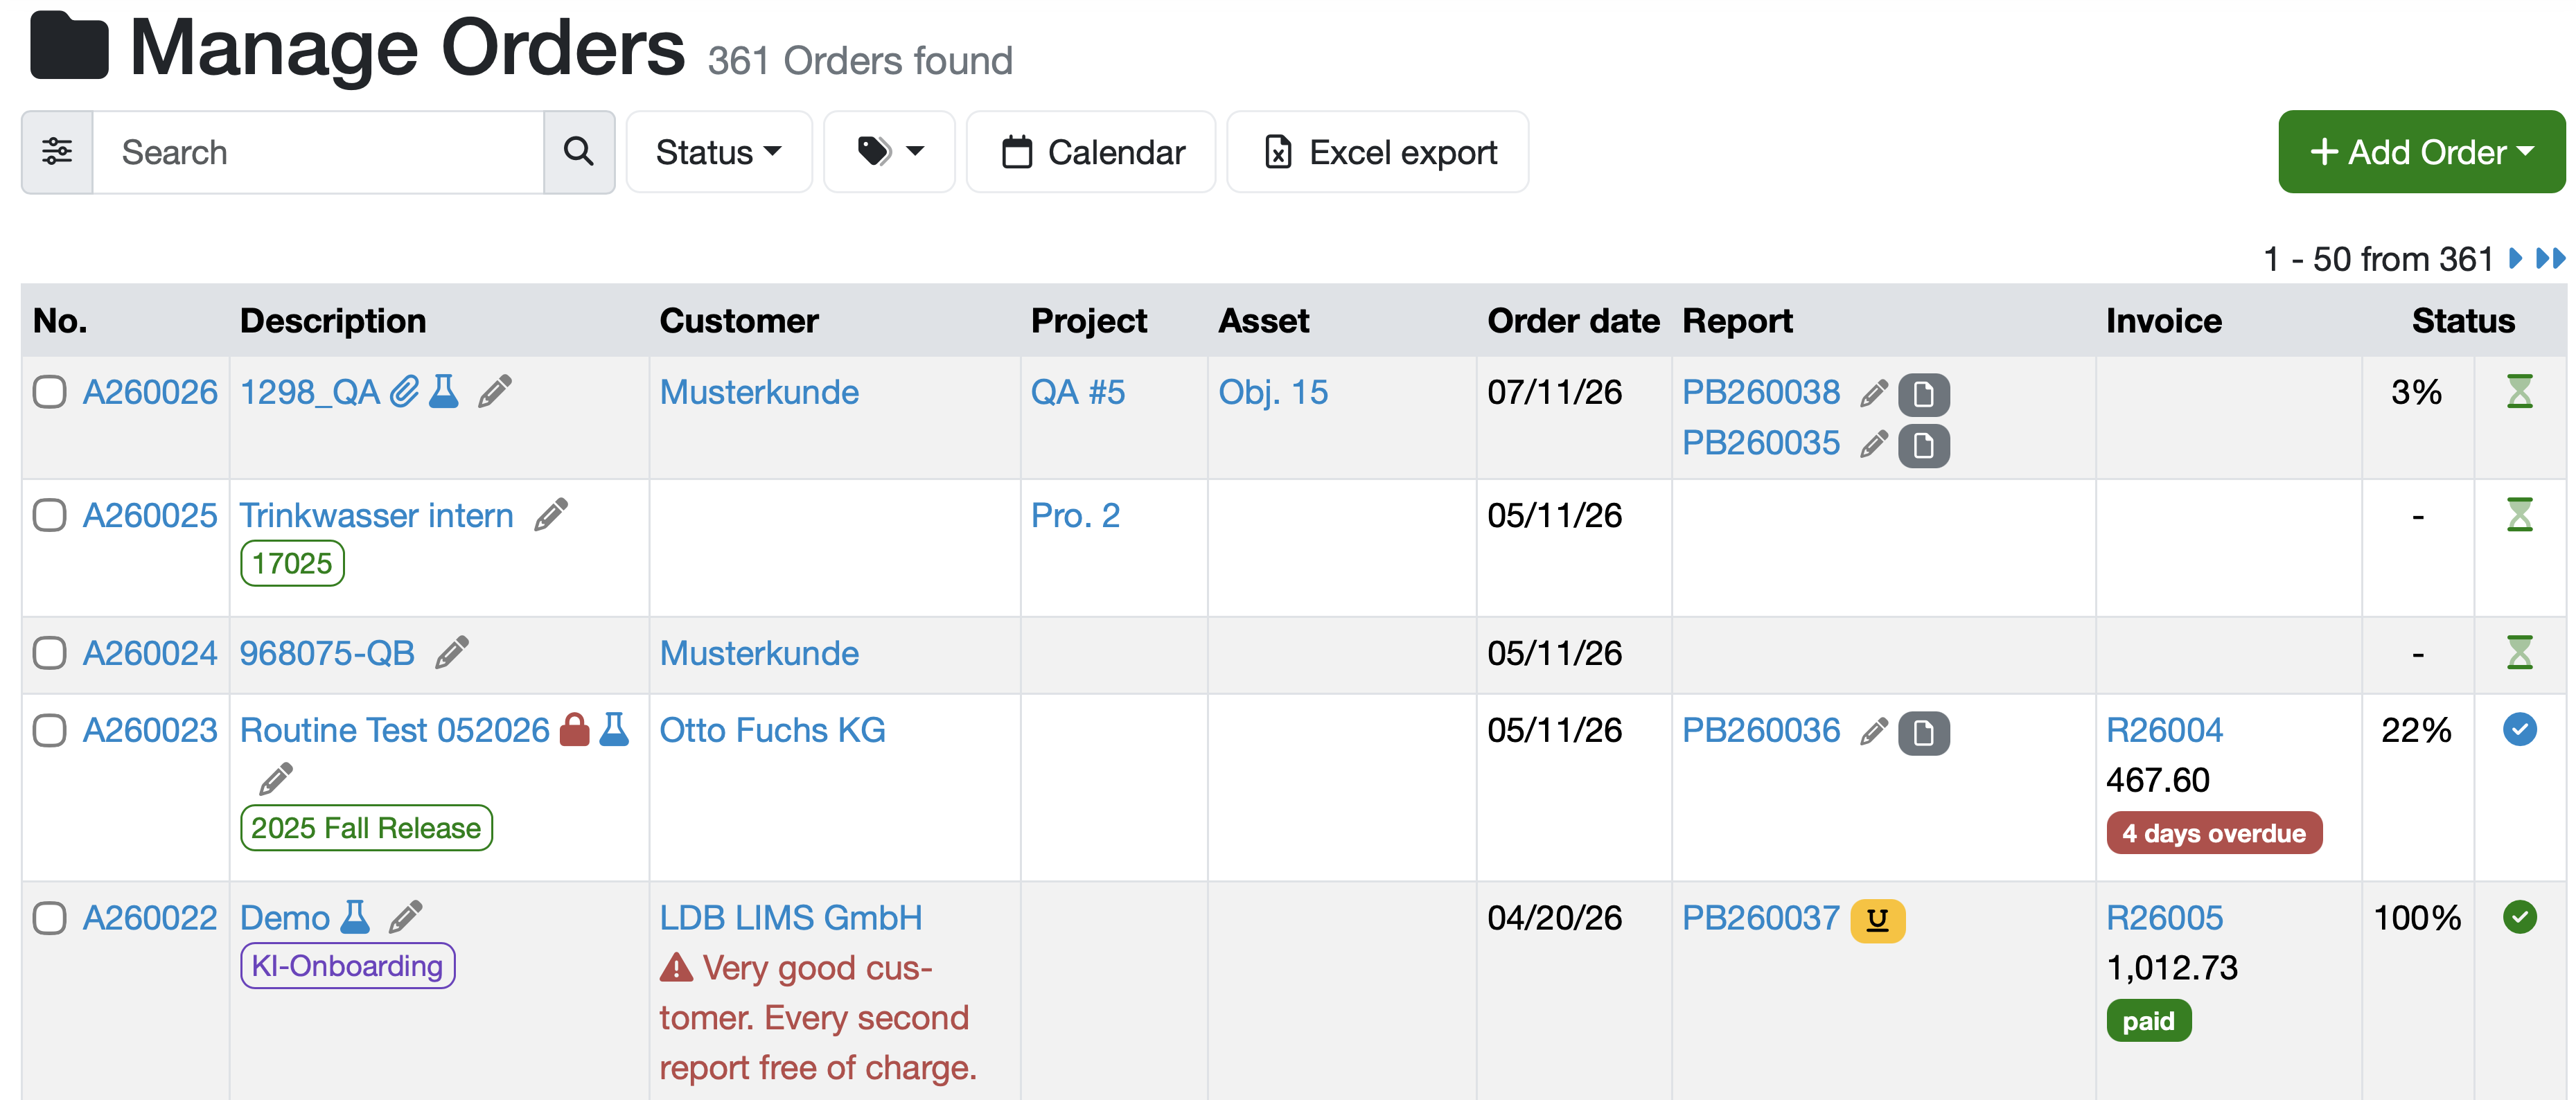
Figure: Order management overview
| Column | Description |
|---|---|
| No. | The order number as a blue link to the order's detail view. To the left of the number is a checkbox for selecting the order. |
| Description | Name or short description of the order. In addition, icons for attachments, restricted visibility and a pencil icon for direct editing may be shown here. Tags are displayed as coloured badges below the name. |
| Customer | Name of the assigned customer as a clickable link to the customer detail view. Customer notes (e.g. blocking notice or individual remarks) are shown directly below the name in red text. |
| Project | Project assigned to the order as a clickable link. |
| Asset | Asset assigned to the order. |
| Order date | Date the order was recorded, in the configured date format. |
| Report | Linked reports as clickable links. Next to the report name, a pencil icon for editing and an icon for the report's status are shown. |
| Invoice | Linked invoice as a clickable link, together with the invoice amount. The invoice status is shown as a coloured badge (e.g. sent in orange, paid in green). |
| Status | Editing progress of the order as a percentage, plus a coloured status icon. The status can be changed directly in the list, provided the corresponding access rights are available. |
Note: All texts shown in blue in the table are clickable links to the respective data types. Some columns are always present, others are configuration-dependent. The naming of the columns can likewise be configuration-dependent.
Various search options are available to help you find orders quickly and precisely.
Quick search
The quick search enables a cross-data-type search without first switching to the respective area.
/ or s, or click into it and enter your search term.order:searchterm for a targeted search in the order area.Simple search
Advanced search / detailed search
Additional search and filter functions

Figure: Add order
Using the Selected Orders… function, you can apply predefined actions such as edit, add invoice or generate labels to multiple orders.
First select the relevant orders and then choose the desired action.
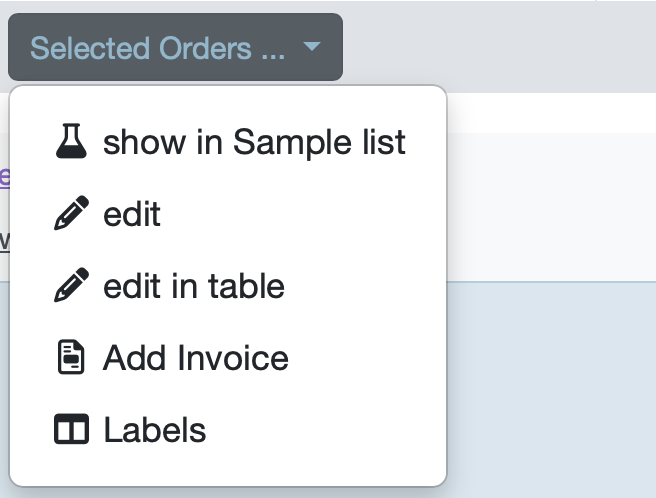
Figure: Actions for Selected Orders…
The available actions are configuration-dependent. Examples:
show in Sample list – show the samples of the selected orders
edit – adjust the entries of all previously selected orders at once. All entries are applied to every selected order.
Note: Fields left blank leave the orders' existing values unchanged.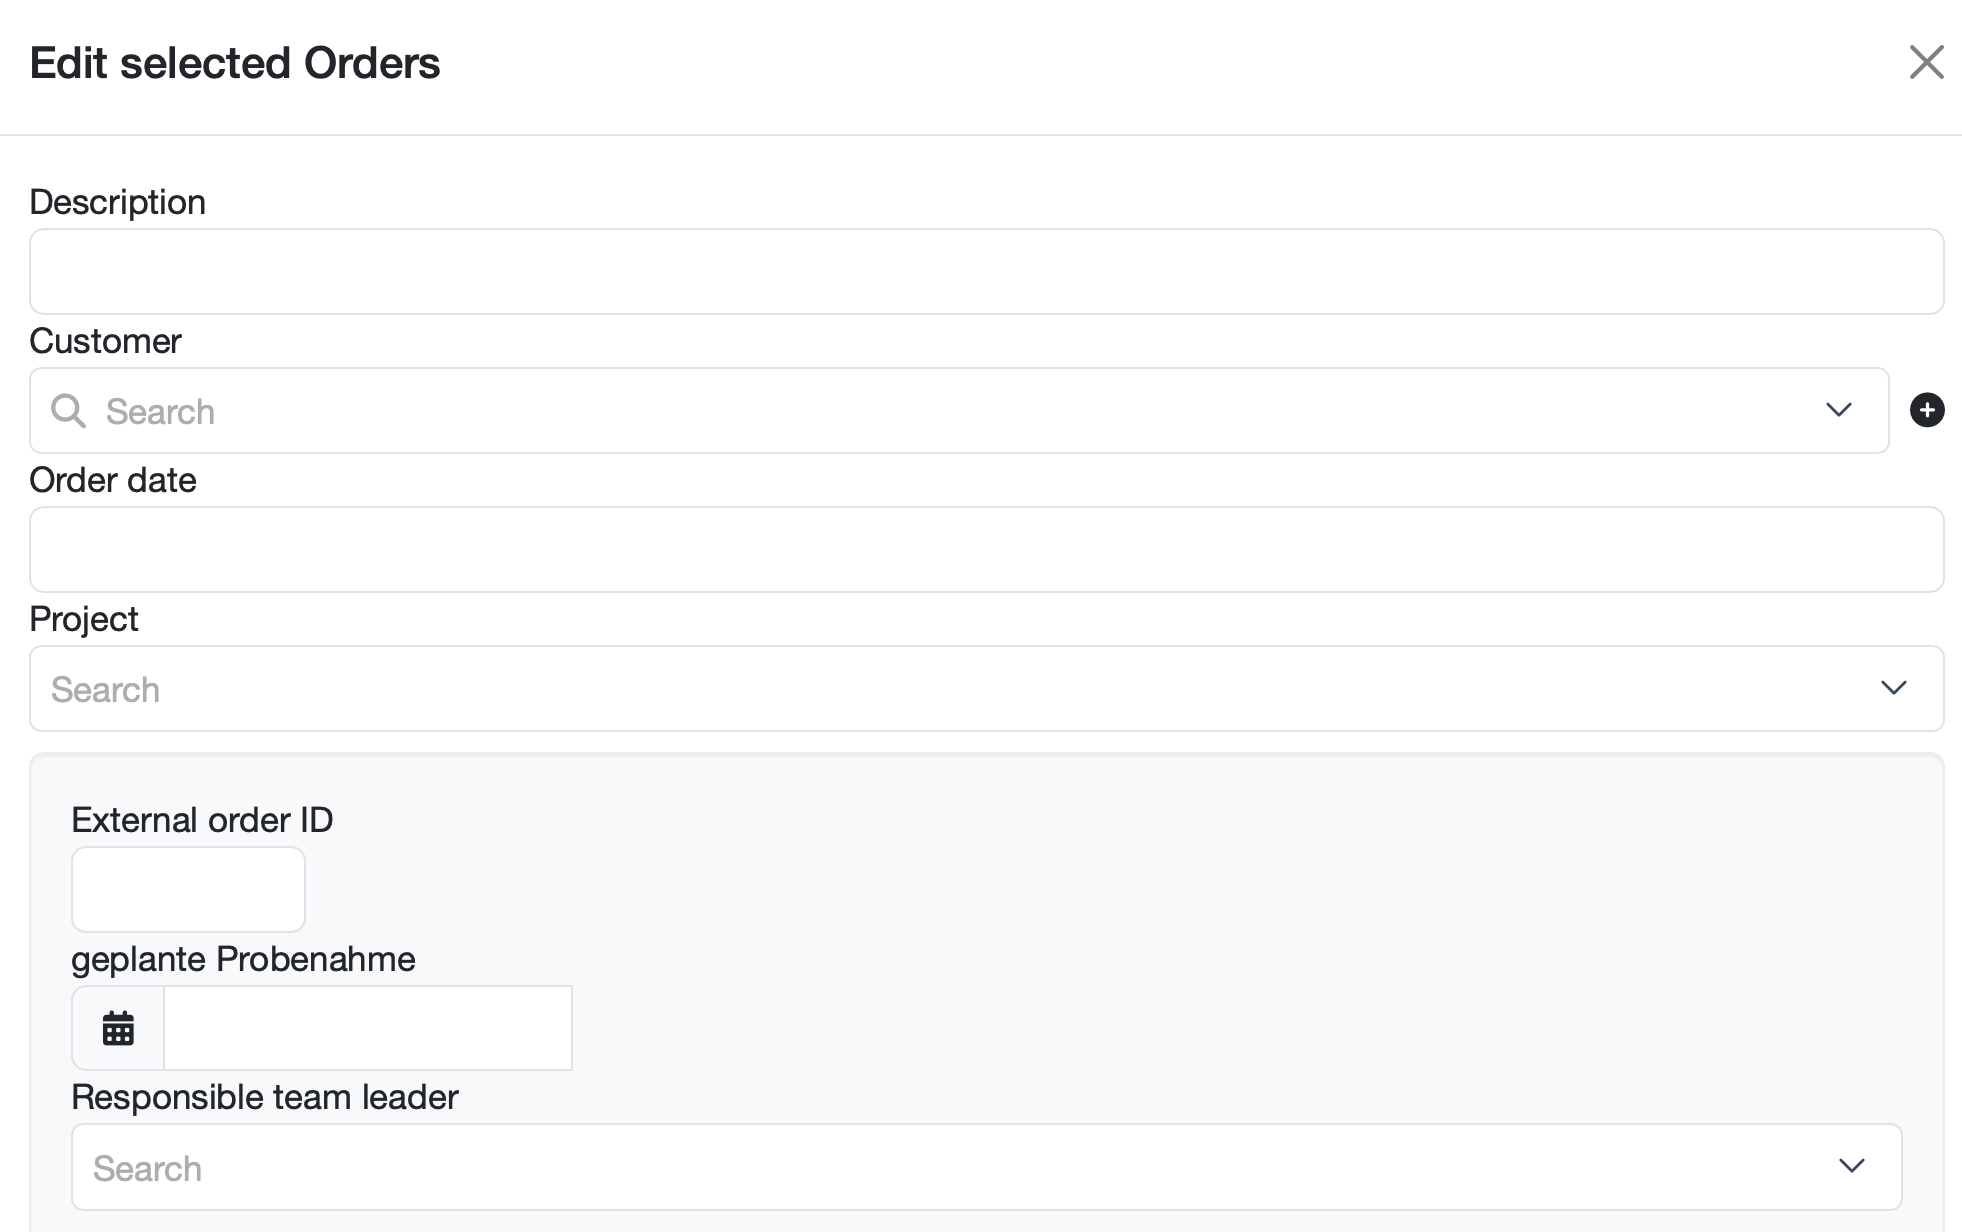
Figure: Edit selected orders
edit in table – edit the entries of multiple orders side by side in a clear table. Each order is shown in its own row and can be adjusted individually.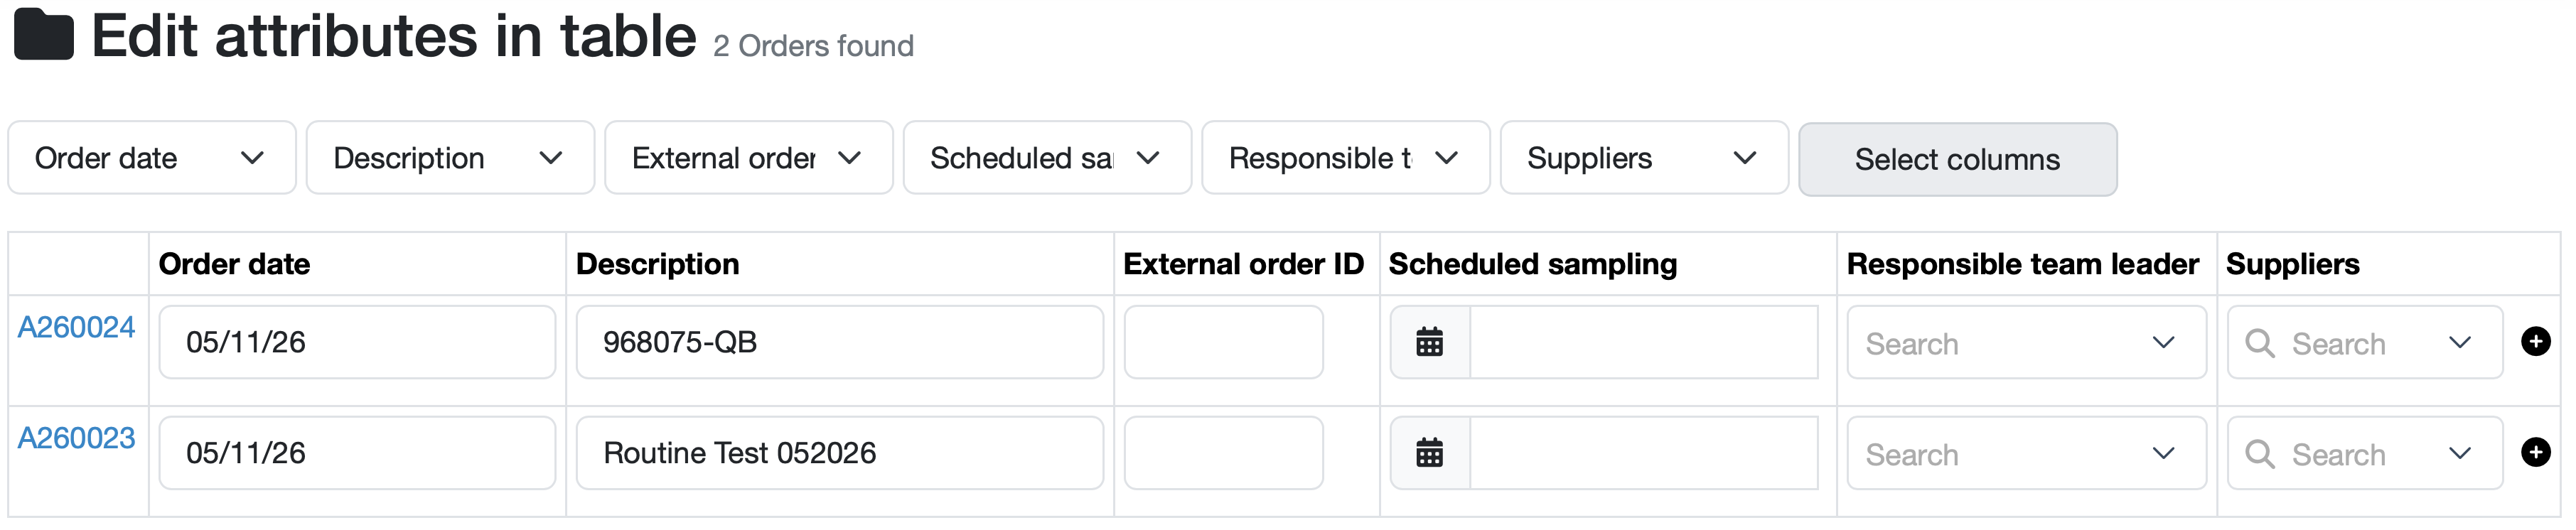
Figure: Edit attributes in table
Add Invoice – create an invoice for the selected orders
Labels – generate labels for the selected orders
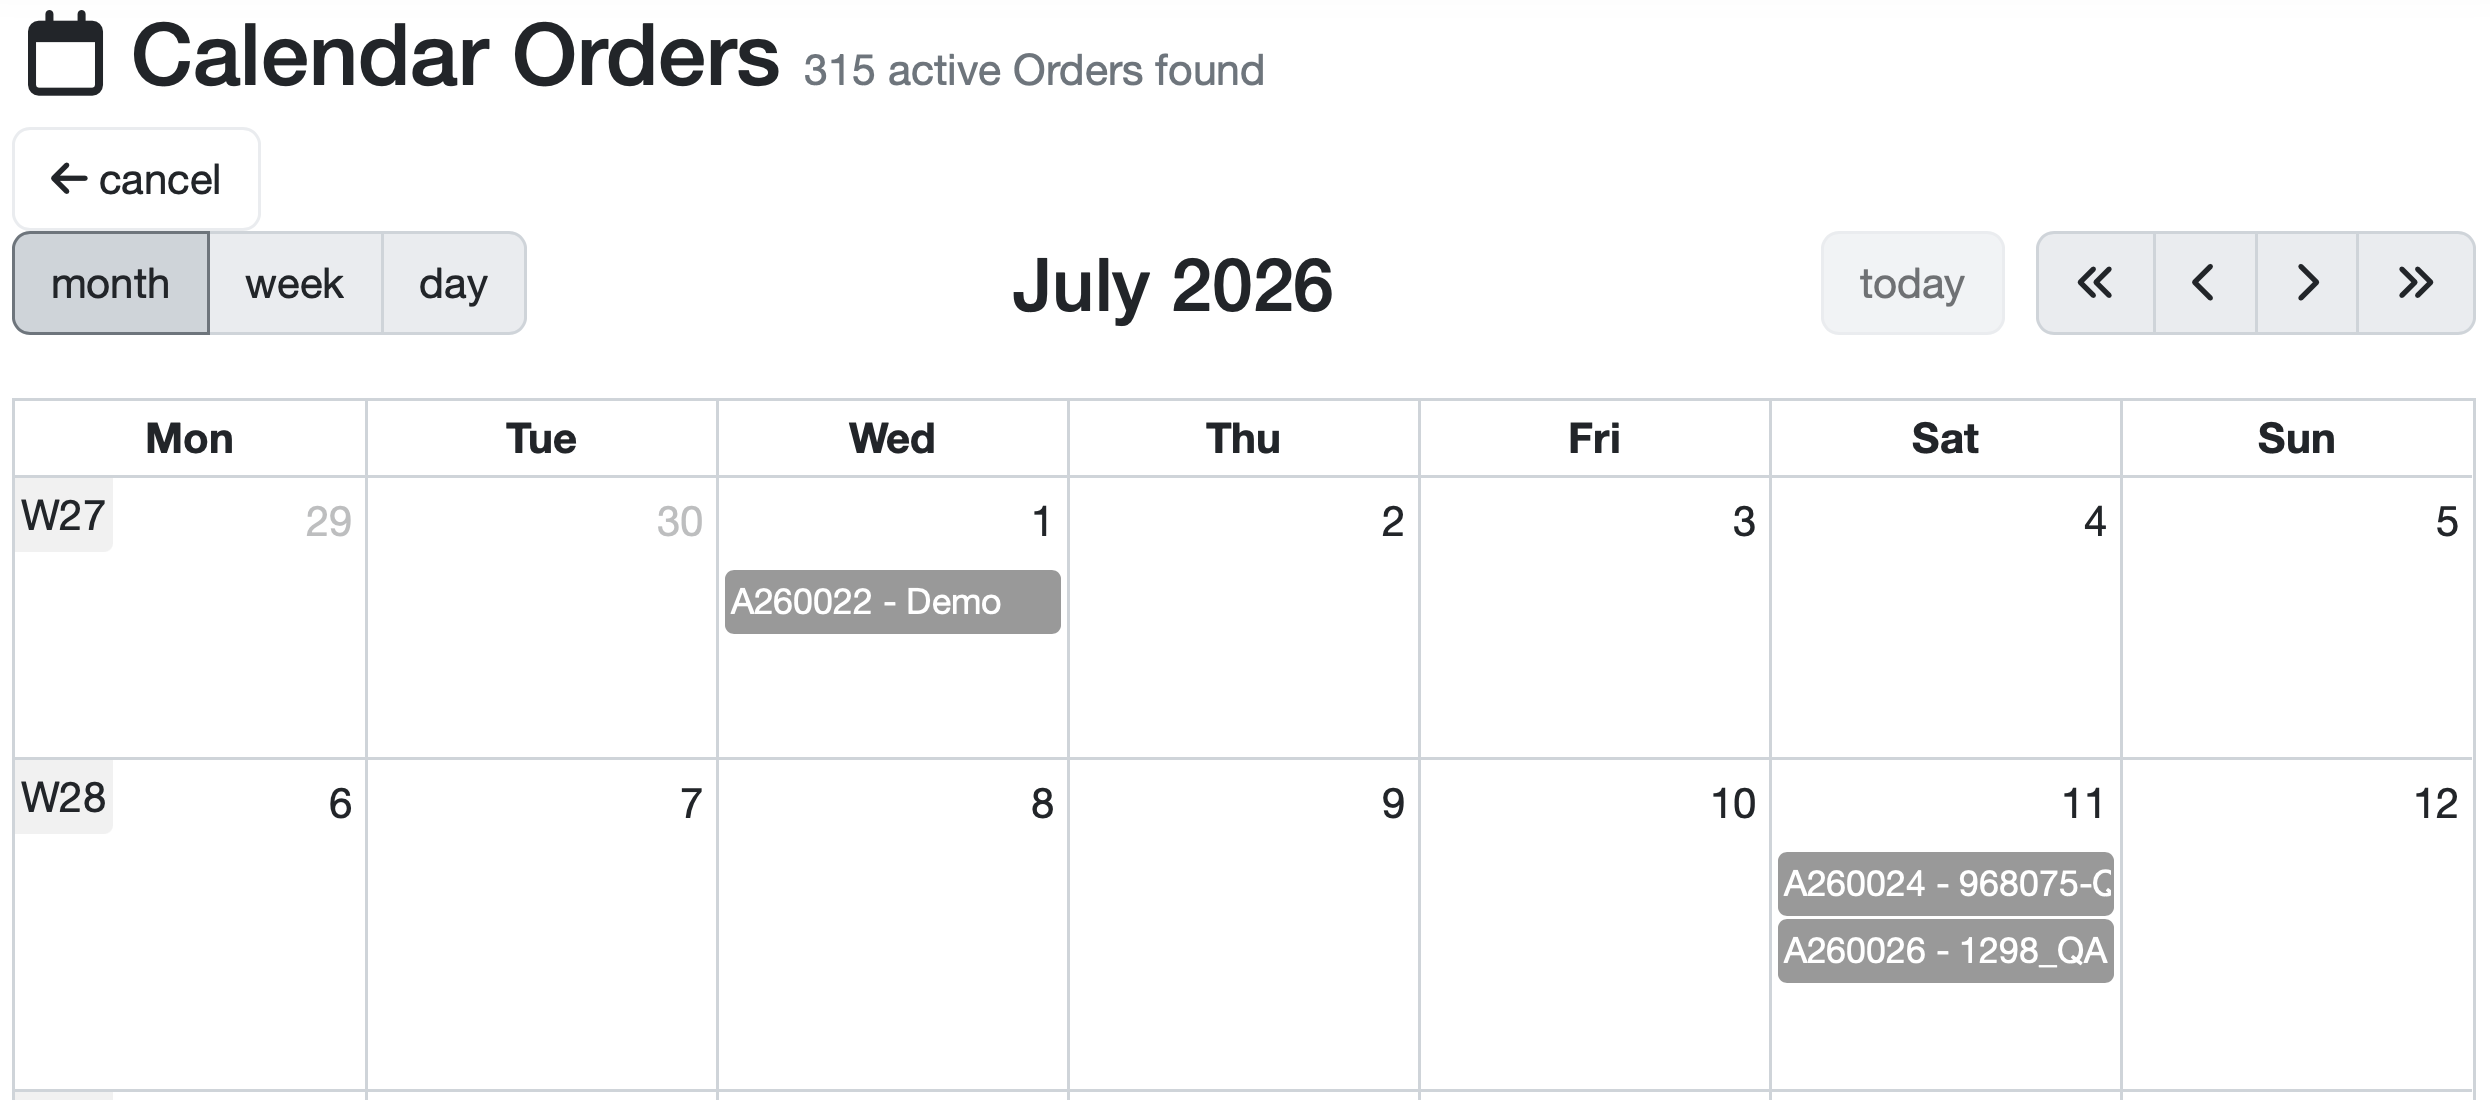
Figure: Calendar view of orders
Sorting logic
The list is ordered according to the configured sorting. The sorting can be adjusted in the system settings.
Number of orders per page
Last change: 10/14/26
General information
8D-report
Supplier evaluation
Material
Employees
Customers
Orders
Samples
PDF templates
Assets
Recipes
Reports
Report table editor
Interfaces
AI functions
Introductory phase
Query reports
Templates
Client zone (optional)
Offers
Invoices
Parameters
Calculating with parameters
Webservices
Transformationscode
Test plans / limit values / specifications
Documents control
Questions and answers
Equipment
Trainings
Others
File management
Processes