Document complaints and quality deviations in a structured way using the 8D method, from the initial complaint through to verifying the effectiveness of the actions taken. Depending on the industry and standard, these are also known as CAPA, corrective action reports (CAR), deviation reports, quality deviation reports or non-conformance reports (NCR).
Navigation
To add an 8D report, follow this path:
Navigation bar → QM → 8D reports → + Add 8D report
Note: The exact names of the menu items may vary depending on the configuration of your LDB.
Overview
With the 8D report, you document quality deviations and complaints as part of quality management in a structured way in eight steps (8D method).
A definition of the 8 steps can be found at: Wikipedia Eight disciplines problem solving
The 8D report in LDB allows you to:
- Put together a team for problem solution
- Link associated data records such as equipment, material, order or customer
- Record the problem description with category, tags and comments
- Define immediate, corrective and preventive measures, which are automatically stored as tasks for the responsible team members
- Document the root cause(s) and the evaluation
- Add files as evidence
- Define who can see the 8D report
- Complete the 8D report and notify the team via e-mail
Add 8D report
An 8D report is divided into several areas that follow the steps of the 8D method. For each area, you define responsibilities and due dates, define and describe the measures, automatically distribute the resulting tasks, link the 8D report to the affected data records, evaluate the effectiveness of the measures and complete the 8D report.
Basic data and team for problem solution
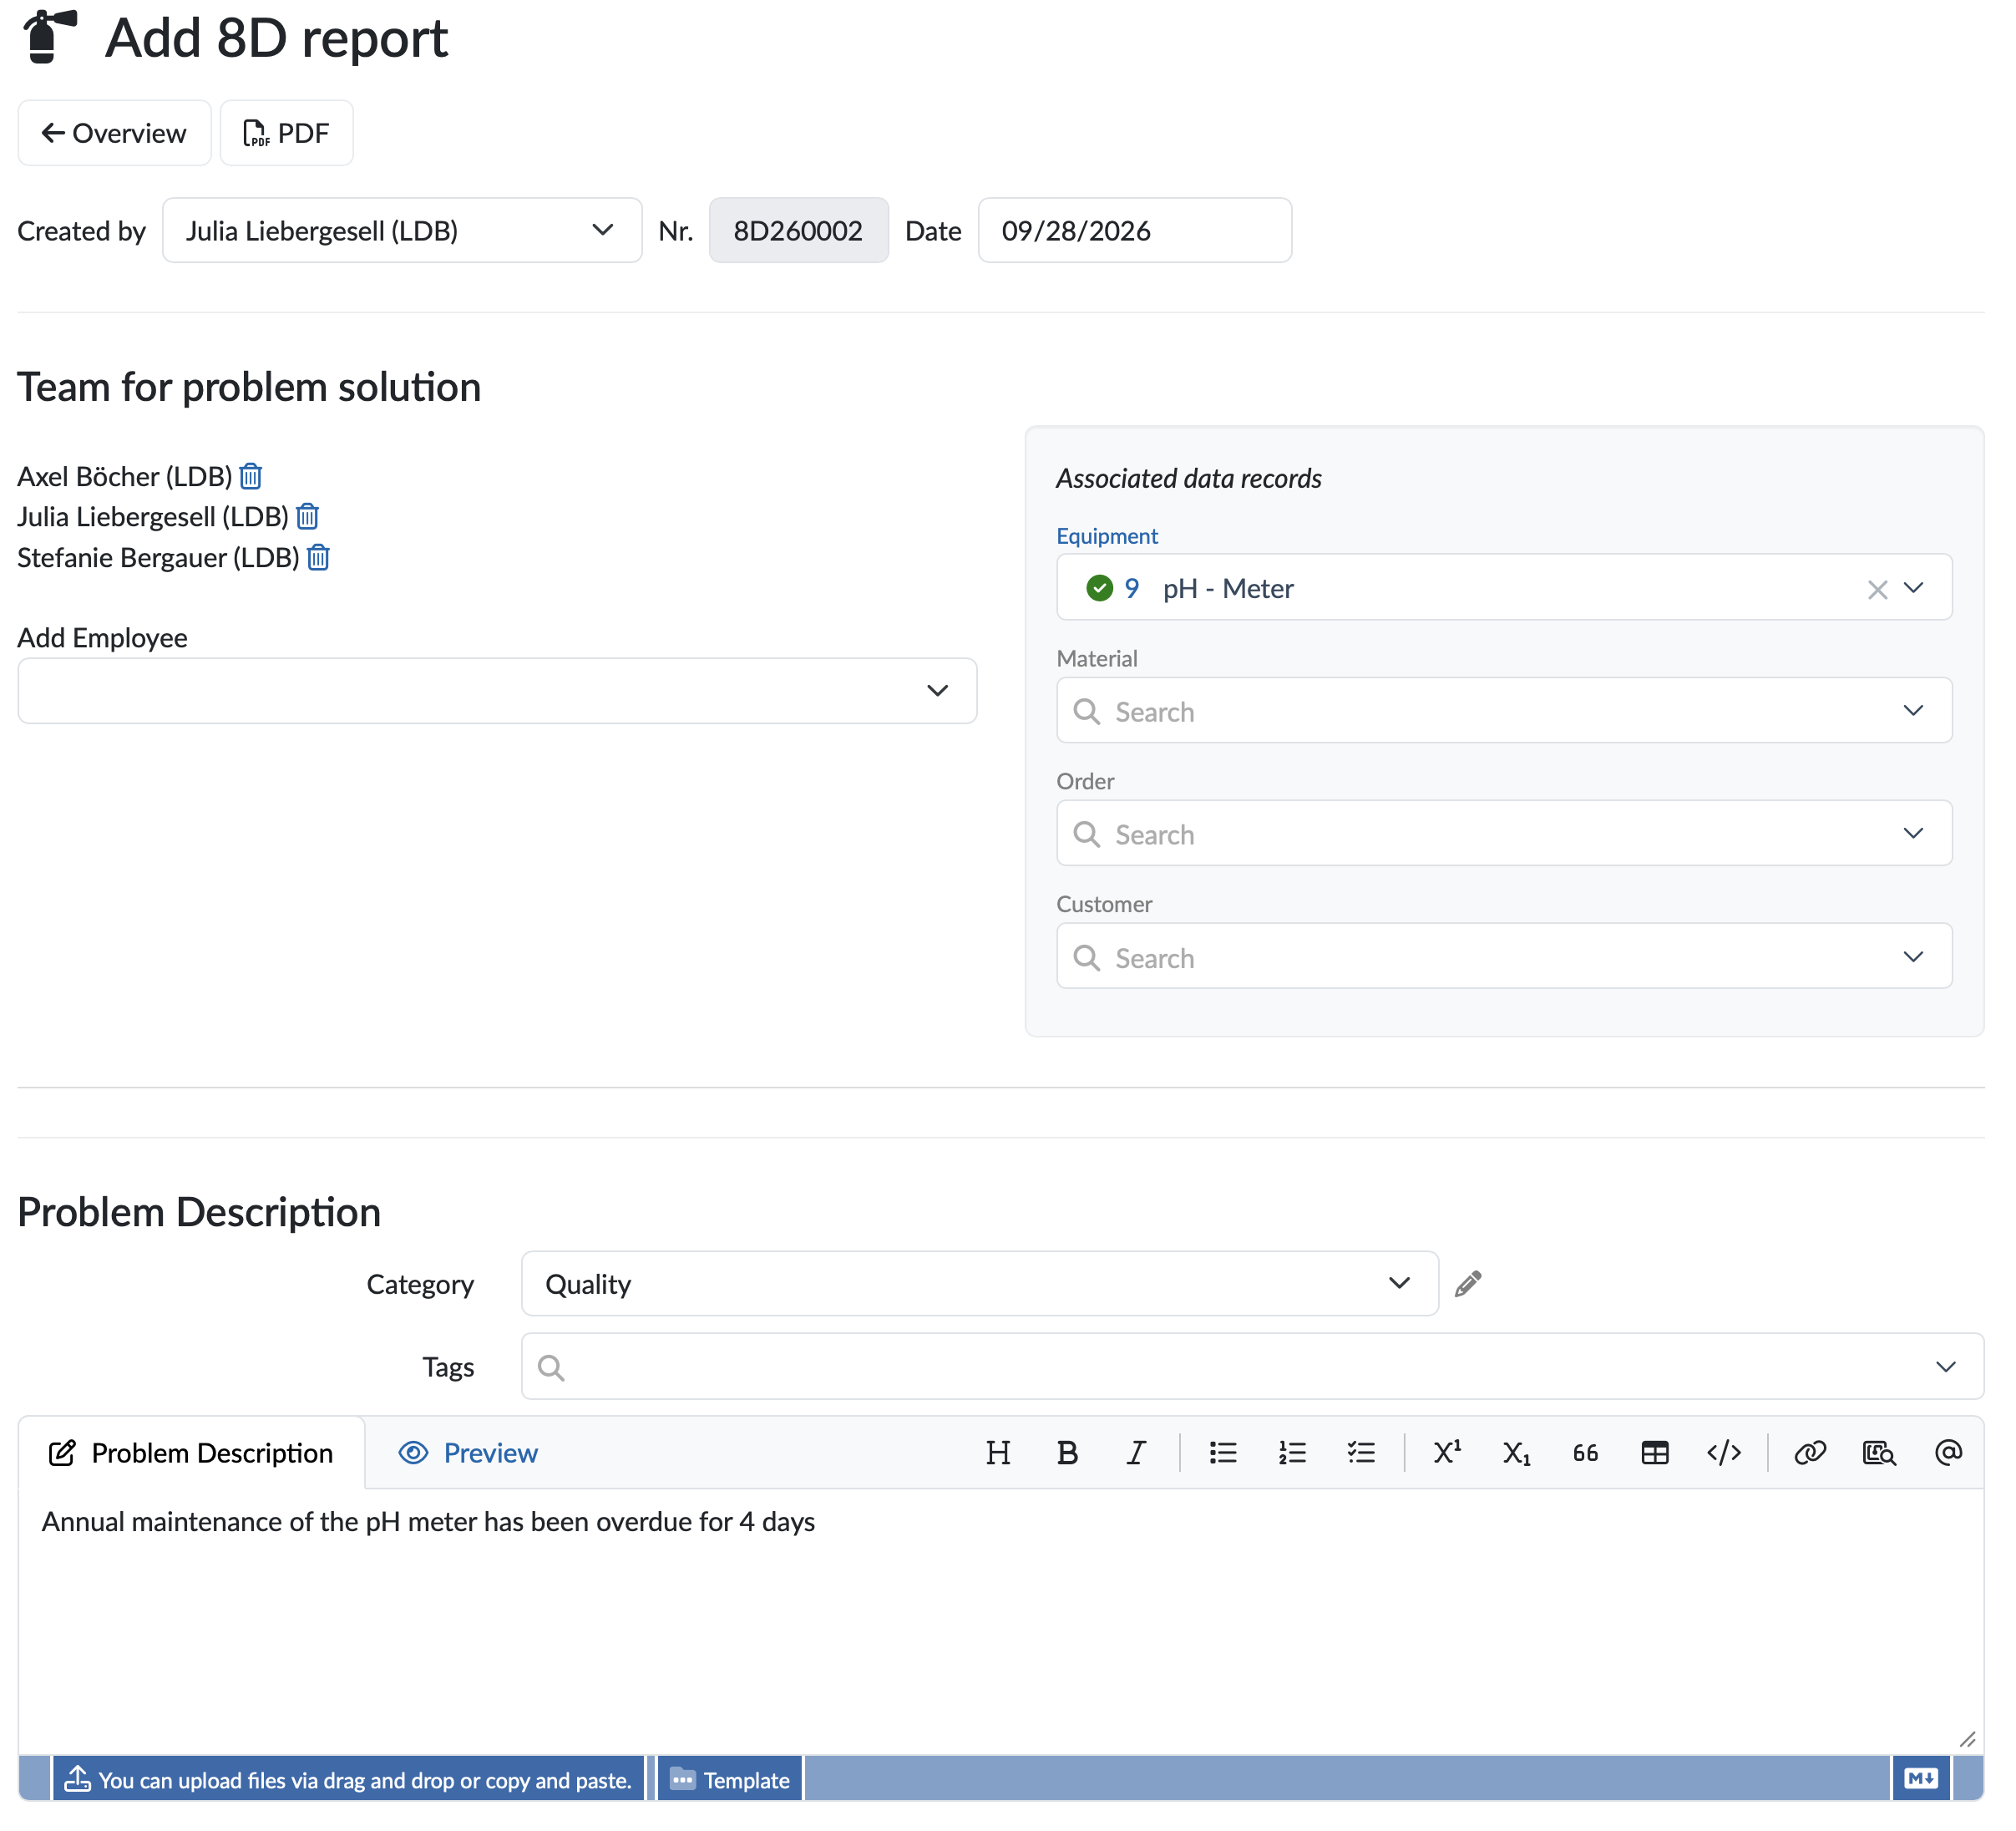
Figure: Basic data, team for problem solution and problem description
- Created by: By default, the logged-in employee is preselected.
- Nr.: The number is assigned automatically when saving.
Note: The number format is configured centrally. Please contact your customer support to adjust the format.
- Date: Enter the date of the 8D report.
- Team for problem solution: In the Add Employee field, select the employees involved in the problem solution. Click the trash icon next to a name to remove an employee from the team.
Assign associated data records
- Equipment, Material, Order, Customer: Use the search fields to link the 8D report to the affected data records. Once assigned, the name of the data type becomes a link highlighted in blue to the data record.
Enter problem description
- Category: Assign the 8D report to a category (e.g. Quality). Click the pencil icon next to the field to edit the available categories.
Further information: Create/Edit/Delete Categories
- Tags: If required, assign tags to find 8D reports more quickly later.
Further information: Tag management
- Problem Description: Describe the problem in the text field. Use the toolbar to format the text and Preview to check the display. Add files via drag and drop or copy and paste, and click Template to insert a predefined text module.
- Comments: Click Write a comment to add remarks to the problem description. You can edit your own comments using the pencil icon.
Note: Additional attributes fields for 8D reports can be configured by your customer support team and will then also appear in this section.
Further information: Configurable attribute fields in the LABORDATENBANK
Define measures and root cause(s)
For each measure, define the responsible employee as well as the due date and time under To be carried out by … till.
Describe the measure in the respective text field.
Click Add further Immediate measure, Add further Corrective measure or Add further Preventive measure to add further measures of the same type if required.
- Immediate measure: Describe how the problem is contained in the short term.
- Root cause(s): Document the identified cause of the problem.
- Corrective measure: Define how the cause is eliminated permanently.
- Preventive measure: Define how a recurrence of the problem is prevented.
- done: Activate the checkbox at the top right of a measure to document it as done. Completed measures are highlighted in green, overdue measures in red (Overdue since …).
Note: The checkbox only appears after the measure has been saved.
Note: The measures are automatically stored as tasks for the selected team members.
Further information: Create task
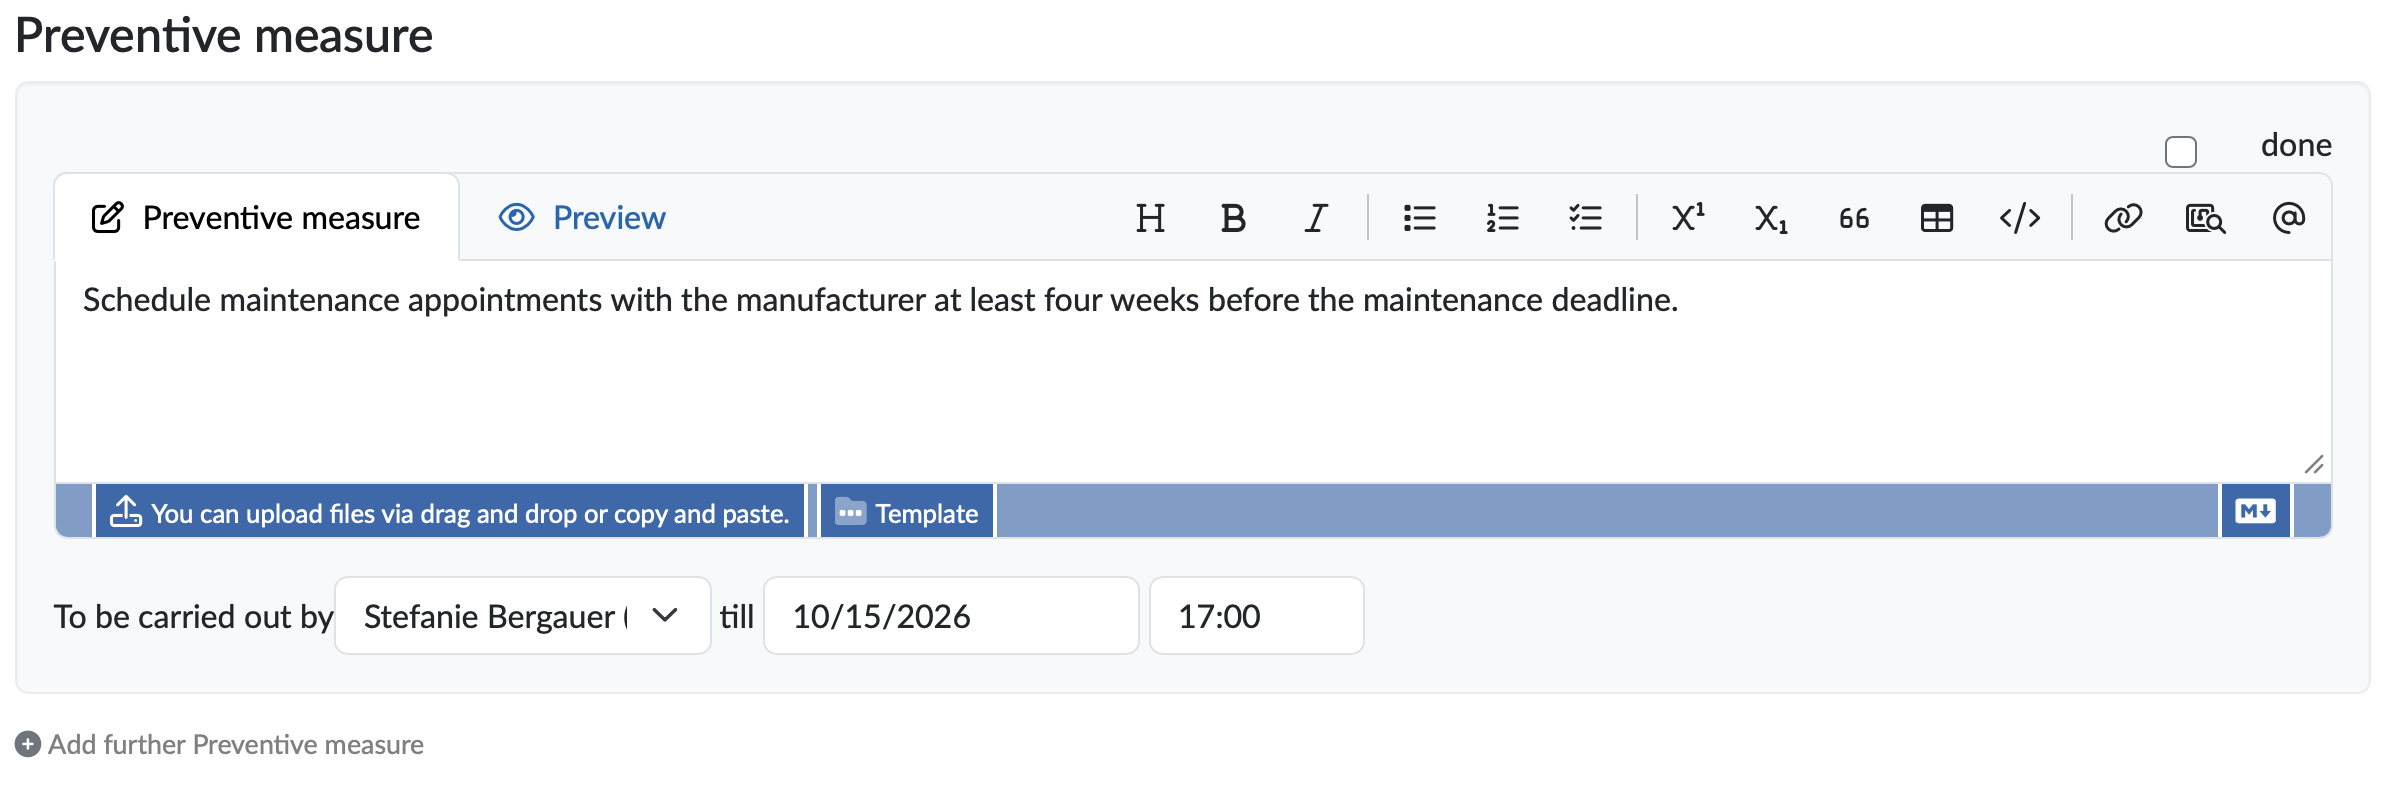
Figure: Define measure
Evaluation and completion
After implementing the measures, you can record the result of your effectiveness check in the evaluation, complete the 8D report and inform the entire team about the completion.
- Evaluation: After implementing the measures, enter an evaluation, e.g. on the effectiveness of the measures.
Note: If necessary, additional attribute fields can be configured for the evaluation.
- 8D report completed: Activate the checkbox to mark the 8D report as completed. The fields on (date) and by (employee) are prefilled automatically and can be adjusted if required. An open 8D report is highlighted in red, a completed one in green.
- Notify all team members via E-Mail.: If the checkbox is activated (default), all team members are informed about the creation or your changes when saving.
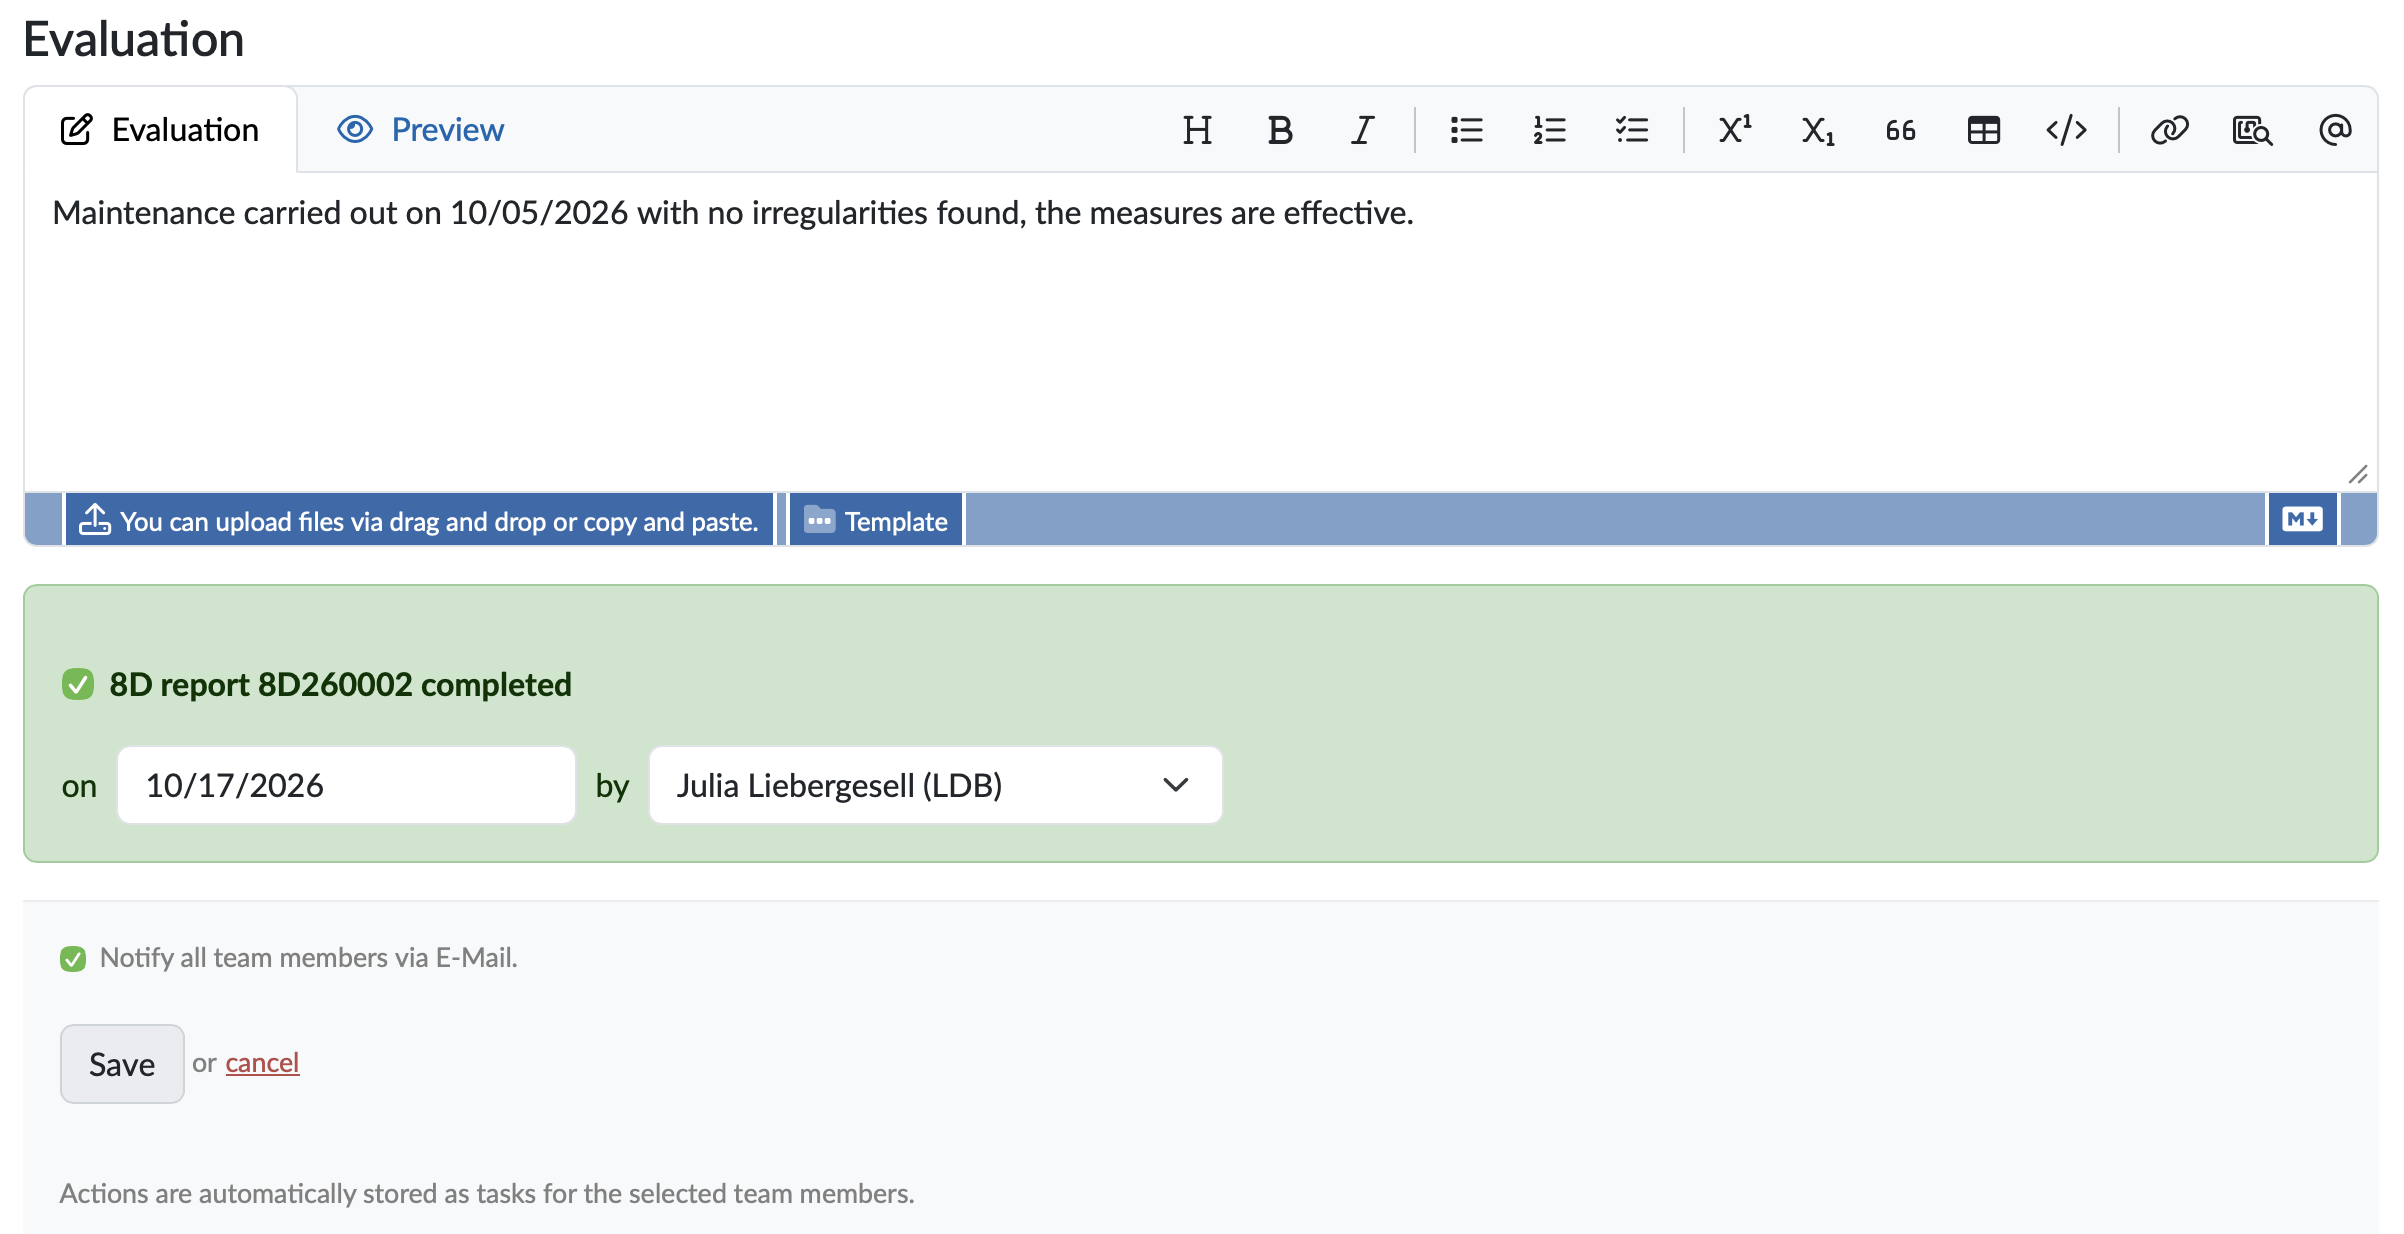
Figure: Evaluation, completion and team notification
Add file
Click Add file in the side area on the right to upload files, e.g. photos, test reports or manufacturer letters for further problem description.
Alternatively, you can add files directly to the relevant text field via drag and drop or copy and paste.
Define visibility
- Who sees this entry?: Define who can see the 8D report:
- Everyone: The 8D report is visible to all employees.
- Only me: The 8D report is only visible to you.
- Employee groups: The 8D report is visible to the selected groups.
- Employees: The 8D report is visible to the selected employees.
Edit 8D report
- Open the 8D report management via: Navigation bar → QM → 8D reports
- Click the 8D report number highlighted in blue. If required, use the search function to find the 8D report more quickly.
- In the detail view, click the orange button Edit 8D report at the top right.
- Click Overview to return to the 8D report management, or PDF to create a PDF of the 8D report.
Our recommendation: Keep the checkbox Notify all team members via E-Mail. activated when making changes. This way, the entire team is always informed about the current status of the problem solution.
Changes to the 8D report are logged in the audit trail. You can open it via Show history at the bottom of the page.
Further information: Audit Trail: traceable documentation of all work
Related topics