This onboarding video provides a compact introduction to the client zone of the LDB. The workshop is a live recording. It shows you how your customers use the client zone and how to set up access, templates, price items and query reports. Below you will find the workshop content summarized and supplemented with selected topics.
Your customers log in via your laboratory's login page:
https://labordatenbank.com/demo/customers/login
You can provide this link on your website or intranet, for example.
To open the client zone from the customer's perspective, follow this path:
Navigation bar → Manage customers → Click on the desired customer → Show client zone
Note: The exact names of the menu items may vary depending on the configuration of your LDB.
The client zone is an optional add-on module of the LDB.
The start page of the client zone brings together all essential information in a clear layout. This allows your customers to check the processing status and results of their requested analyses independently at any time.
The client zone offers the following benefits:
Note: The online order request is optional. You can also use the client zone solely for viewing results and reports.
To enable your customers to use the client zone, set it up in your LDB in a few steps. Three building blocks are essential: access rights, templates and price items.
Further information: Activating the Customer Zone
Our recommendation: Open the client zone via Show client zone before passing on access. This way, you can see exactly what content your customers will be shown. Start with a customer you have been working with for some time.
Your customers log in via your laboratory's login page:
https://labordatenbank.com/https://labordatenbank.com/demo//customers/login
You can provide this link on your website or intranet, for example.
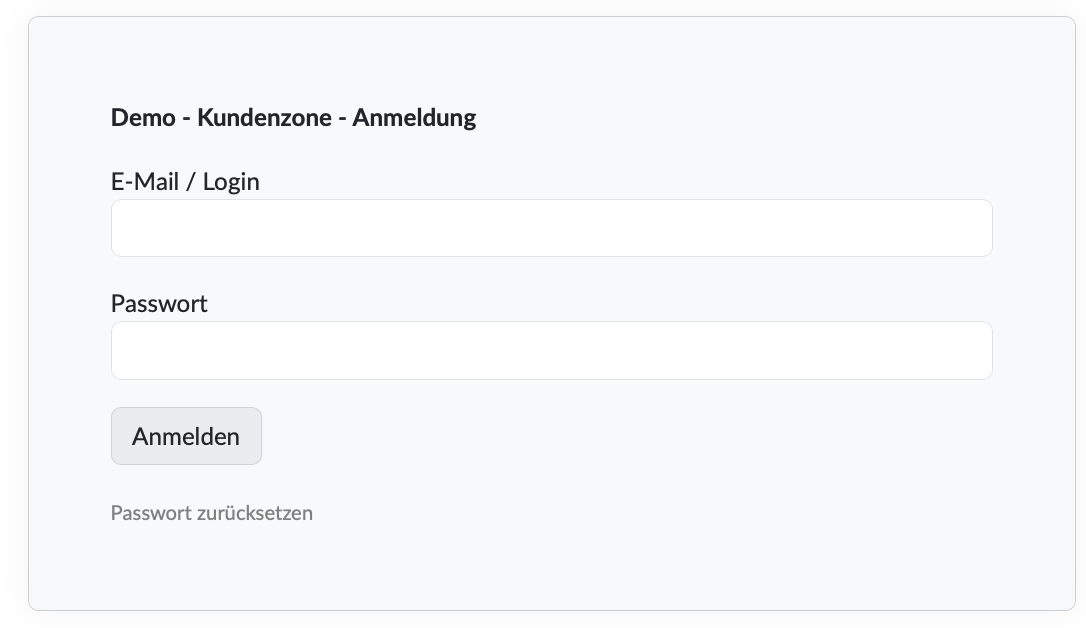
Figure: Login screen of the client zone
Our recommendation: Create personal accounts rather than shared accounts wherever possible, and recommend that your customers activate two-factor authentication under Edit my account.
The figure shows the start page as your customers see it after logging in.
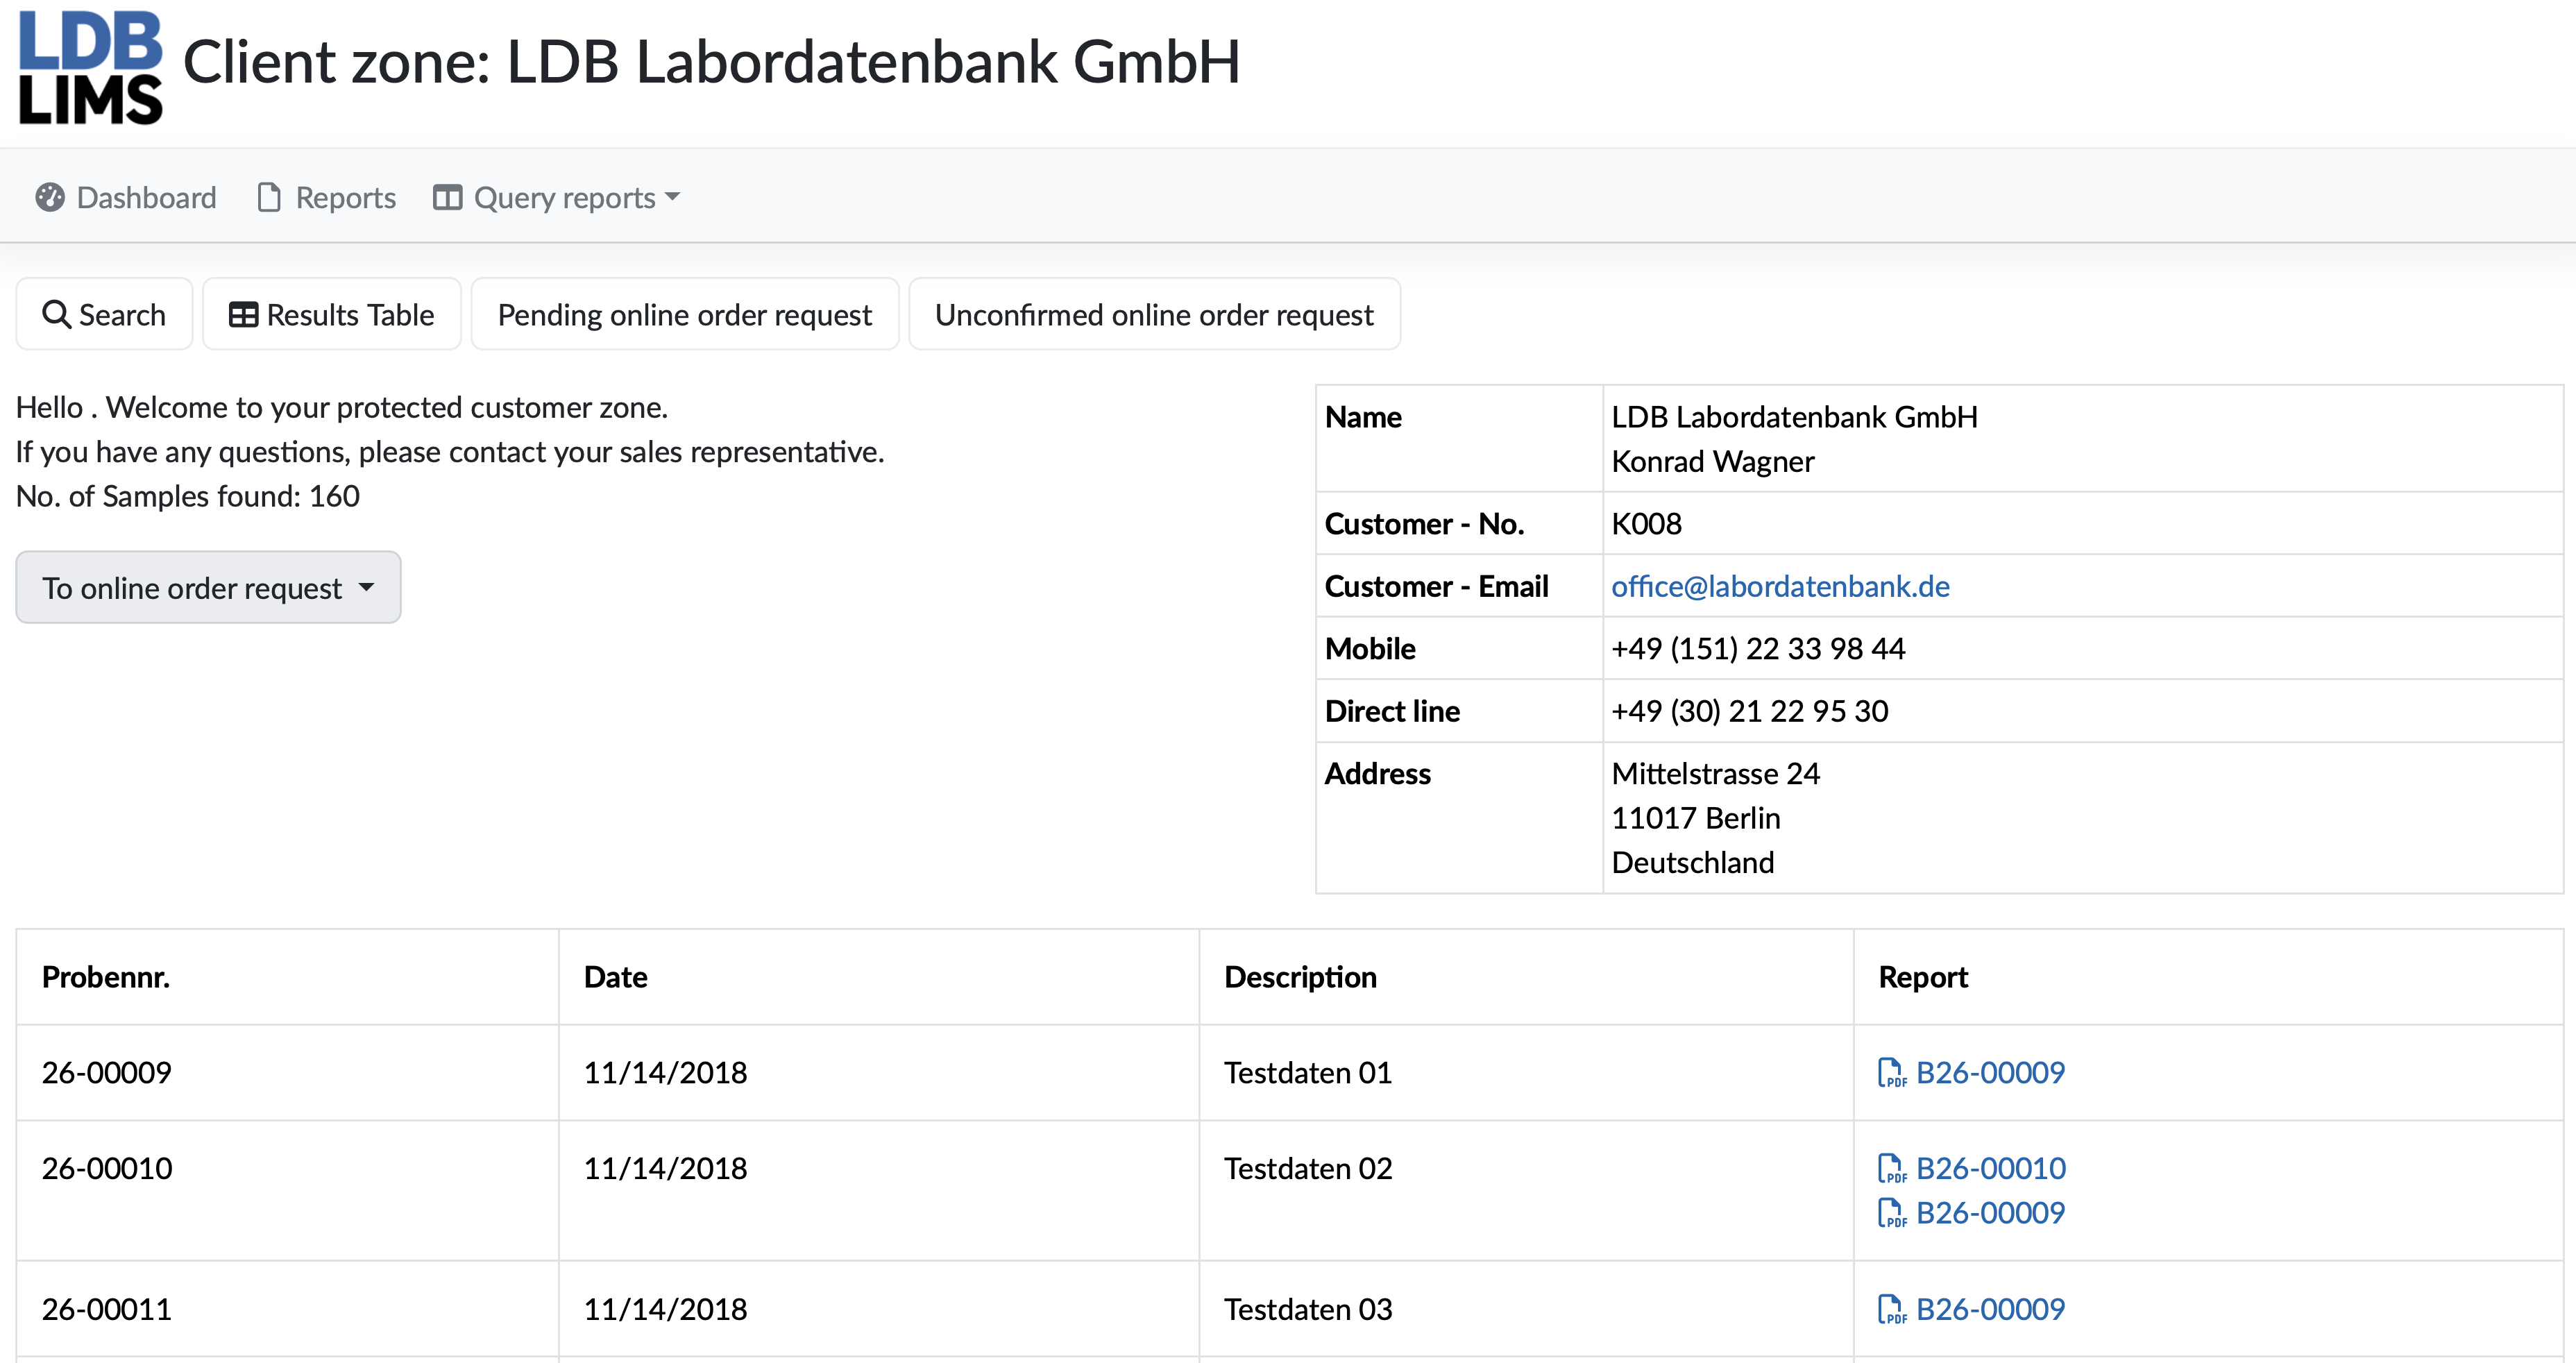
Figure: Start page of the client zone from the customer's perspective
Note: All text highlighted in blue consists of clickable links to the respective data types. Some areas and functions are always available, others depend on the configuration of your LDB. The naming may also depend on the configuration.
This area shows your laboratory logo and the title of the client zone. The title contains the name of the logged-in company or organization. You define it in the customer management.
| Menu item | Description |
|---|---|
| Dashboard | Shows the query reports you have enabled for the dashboard, e.g. individually configured charts or trend charts. Only appears if at least one such query report exists. |
| Reports | Returns to the start page with the overview of samples or orders and reports. |
| Query reports | Dropdown with the enabled query reports. |
Note: Depending on the configuration, additional menu items appear, e.g. Files with documents you have released, such as terms and conditions or SOPs. When logged in via a contact, Edit my account and Logout also appear on the right.
Below the navigation bar, the following buttons are available to your customers:
| Button | Description |
|---|---|
| Search | Opens the search across the customer's own samples, orders and reports. |
| Results Table | Shows the analysis results of the samples in table form. |
| Pending online order request | Lists confirmed requests that have been submitted to your laboratory but not yet accepted, e.g. because the samples have not yet arrived. |
| Unconfirmed online order request | Lists requests that have been created in the client zone but not yet confirmed and therefore not yet submitted to your laboratory. |
This area shows the customer master data as stored in your LDB.
Note: Keep the master data up to date. Personal contact details can, where applicable, be changed directly in the client zone under Edit my account.
The central area lists all assigned samples or orders in a table. What is displayed depends on the setting:
| Column | Description |
|---|---|
| Sample no. or order no. | The sample or order number assigned by your laboratory. |
| Date | Date of the sample or order. |
| Description | Description of the sample or order. |
| Report | The associated reports as PDF links highlighted in blue. |
Note: If no released report is available yet, a message such as Report not yet available appears. You define which reports are displayed (e.g. signed reports only) in the system settings. The overview shows all assigned samples or orders, including older ones and those that were not requested via the client zone.
With an online order request, your customers request analyses directly in the client zone and enter the associated sample data themselves. This information is then available to your laboratory in a structured form, without manually typing up accompanying forms.
Note: Depending on the setting (Grouping of the client zone view, see Client zone settings), requests are processed in one of two ways. The setting also determines whether the overview on the start page lists samples or orders.
Further information: Create Online Analysis Order
Unconfirmed online order request
Unconfirmed online order request shows requests that have been created in the client zone but not yet confirmed and therefore not yet submitted to your laboratory. If your laboratory has rejected a request, it also appears here, together with the Reason for rejection by laboratory (e.g. missing information).
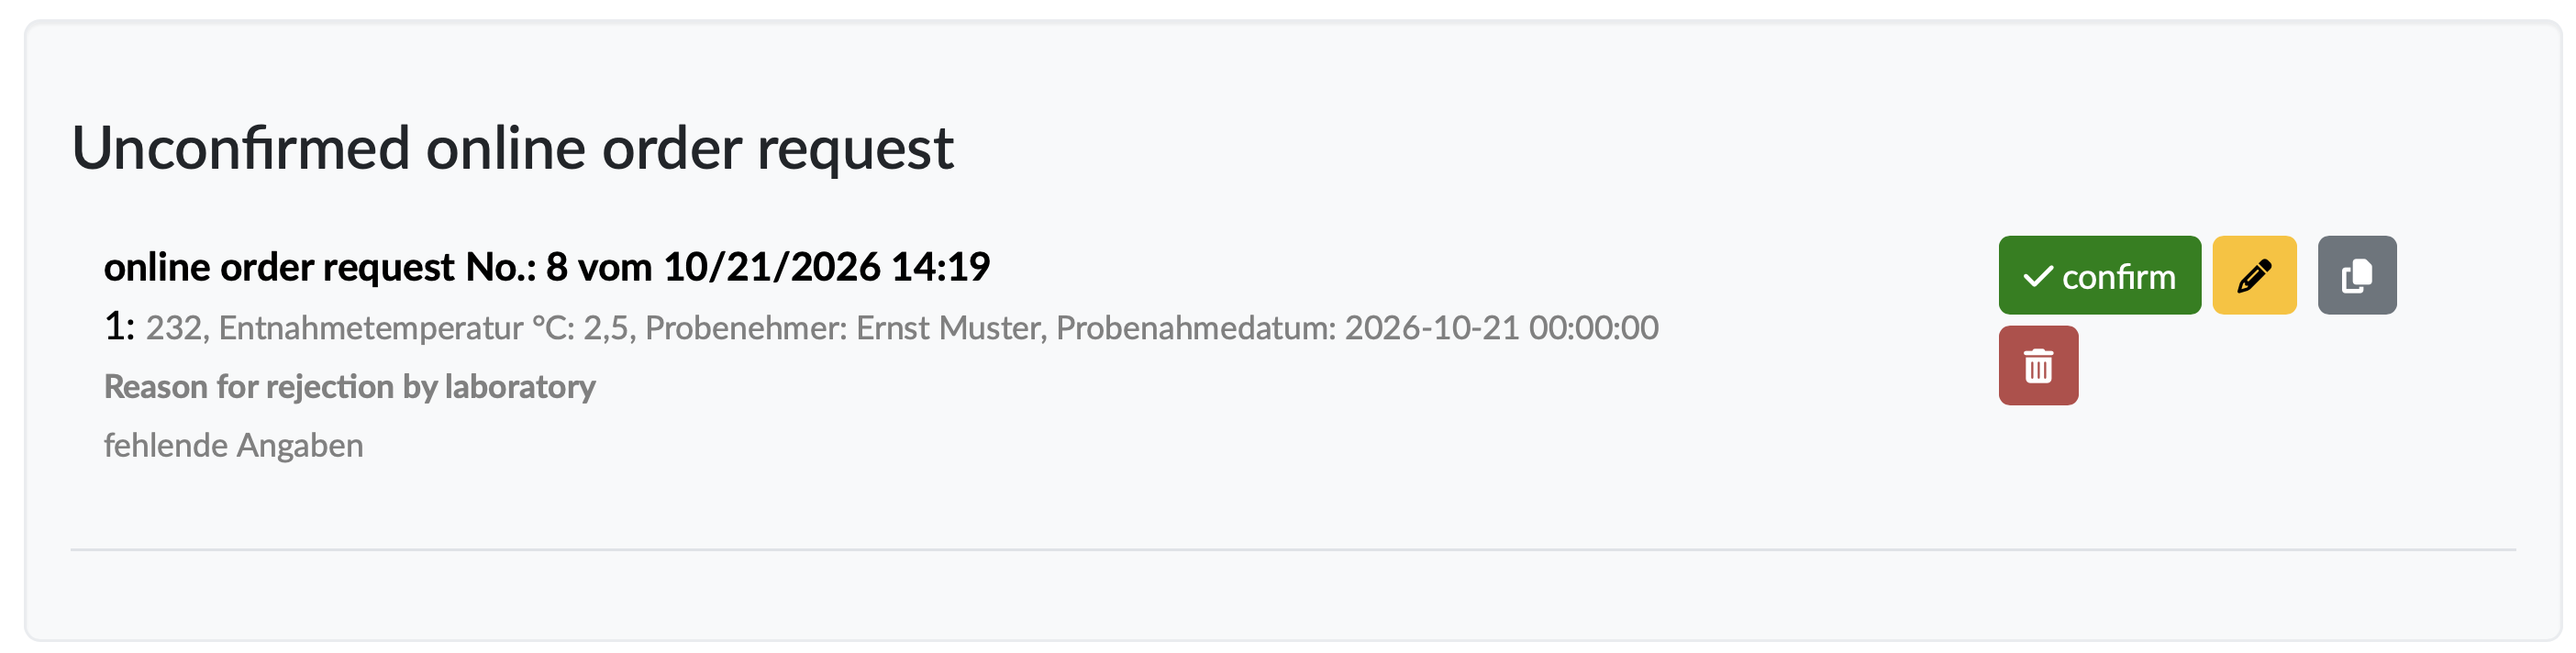
Figure: Unconfirmed online order request
For each request, the request number, date and time, and the entered samples with their details are displayed. The following buttons are available:
Pending online order request
Pending online order request shows confirmed requests that have been submitted to your laboratory but not yet accepted by it.
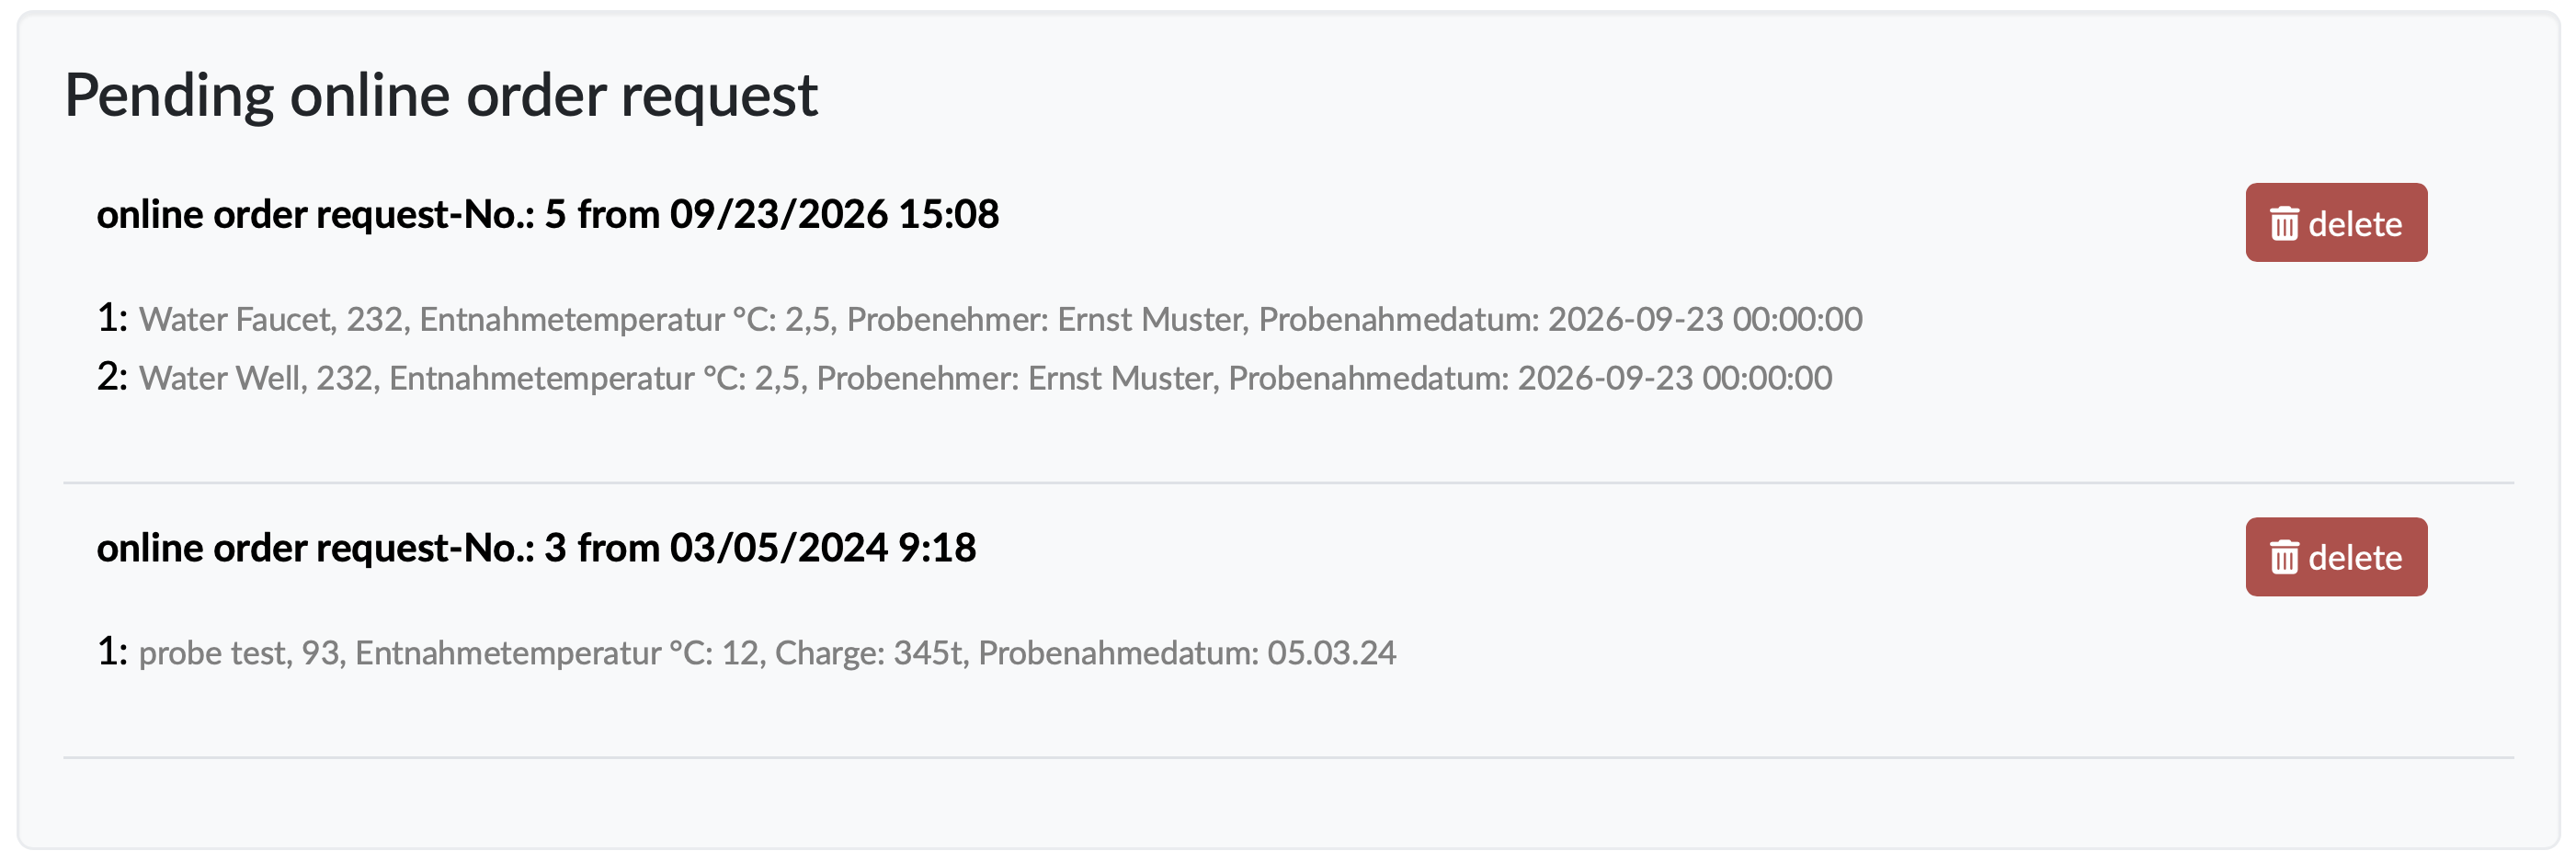
Figure: Pending online order request
For each request, the request number, date and time, and the samples with the entered details are displayed, e.g. description, sampling date or person who took the sample. Using the delete button, a request can be withdrawn as long as your laboratory has not yet accepted it.
After acceptance by your laboratory
As soon as you have accepted the request, the samples or the new order appear in the overview on the start page, depending on the setting. Released reports are available for download there.
Note: If a query report is enabled for all customers, restrict the query via the customer ID so that each customer can only see their own data. Otherwise, all customers will see the data of the entire query report.
Our recommendation: Provide query reports with trend charts. This allows results to be tracked over a longer period without manually compiling values from individual reports.
Further information: Create / Edit query reports
The client zone can be adapted to the requirements of your laboratory. You make some of the settings yourself, while others are configured for you by LDB Support.
Under Navigation bar → Settings → System settings → Client zone, you can adjust the most important content yourself (access rights required):
_CUSTOMER_NAME_ or _CONTACT_FULL_NAME_.The client zone is displayed in the language stored in the master data of the respective customer. For example, a customer from France sees the client zone in French, while a customer from a German-speaking country sees it in German.
The following languages are currently available: German, English, French, Dutch, Polish, Spanish, Hungarian, Italian, Chinese (Simplified), Finnish, Swedish, Norwegian (Bokmål), Danish and Romanian.
LDB Support makes further settings for you on request:
Our recommendation: Contact your customer support if you would like to change settings from the support area, e.g. a custom overview table.
Last change: 11/10/26
General information
Client zone (optional)
8D-report
Supplier evaluation
Material
Employees
Customers
Orders
Samples
PDF templates
Assets
Recipes
Reports
Report table editor
Interfaces
AI functions
Introductory phase
Query reports
Templates
Offers
Invoices
Parameters
Calculating with parameters
Webservices
Transformationscode
Test plans / limit values / specifications
Documents control
Questions and answers
Equipment
Trainings
Others
File management
Processes