Create/edit/delete customer

The guide describes how to add customers to the system, including navigation paths, entering customer information and configured attributes, as well as options for archiving or locking customers and adding warning notices.

Navigation

To add a customer, follow this path:
Navigation bar → Customers → Add Customer

Note: The exact labels of the menu items may differ depending on the configuration of your LDB.


Overview

The customer record allows you to:

  • Capture customer information (description, contact, address, telephone, web, email, etc.)
  • Store a logo as well as tags for easier retrieval
  • Maintain configured attributes (e.g. terms of payment, tax rate, VAT ID)
  • Create contacts and an access for the customer zone, and set the visibility
  • Control the status and store a warning text

Note: Which areas and functions are displayed depends on your permissions and on the configuration of your LDB. For example, individual areas may not (yet) be enabled for your account.


Add Customer

Entering customer information

The fields for capturing the customer information are described below. Here you can also store a logo and tags in order to find the customer more easily later.
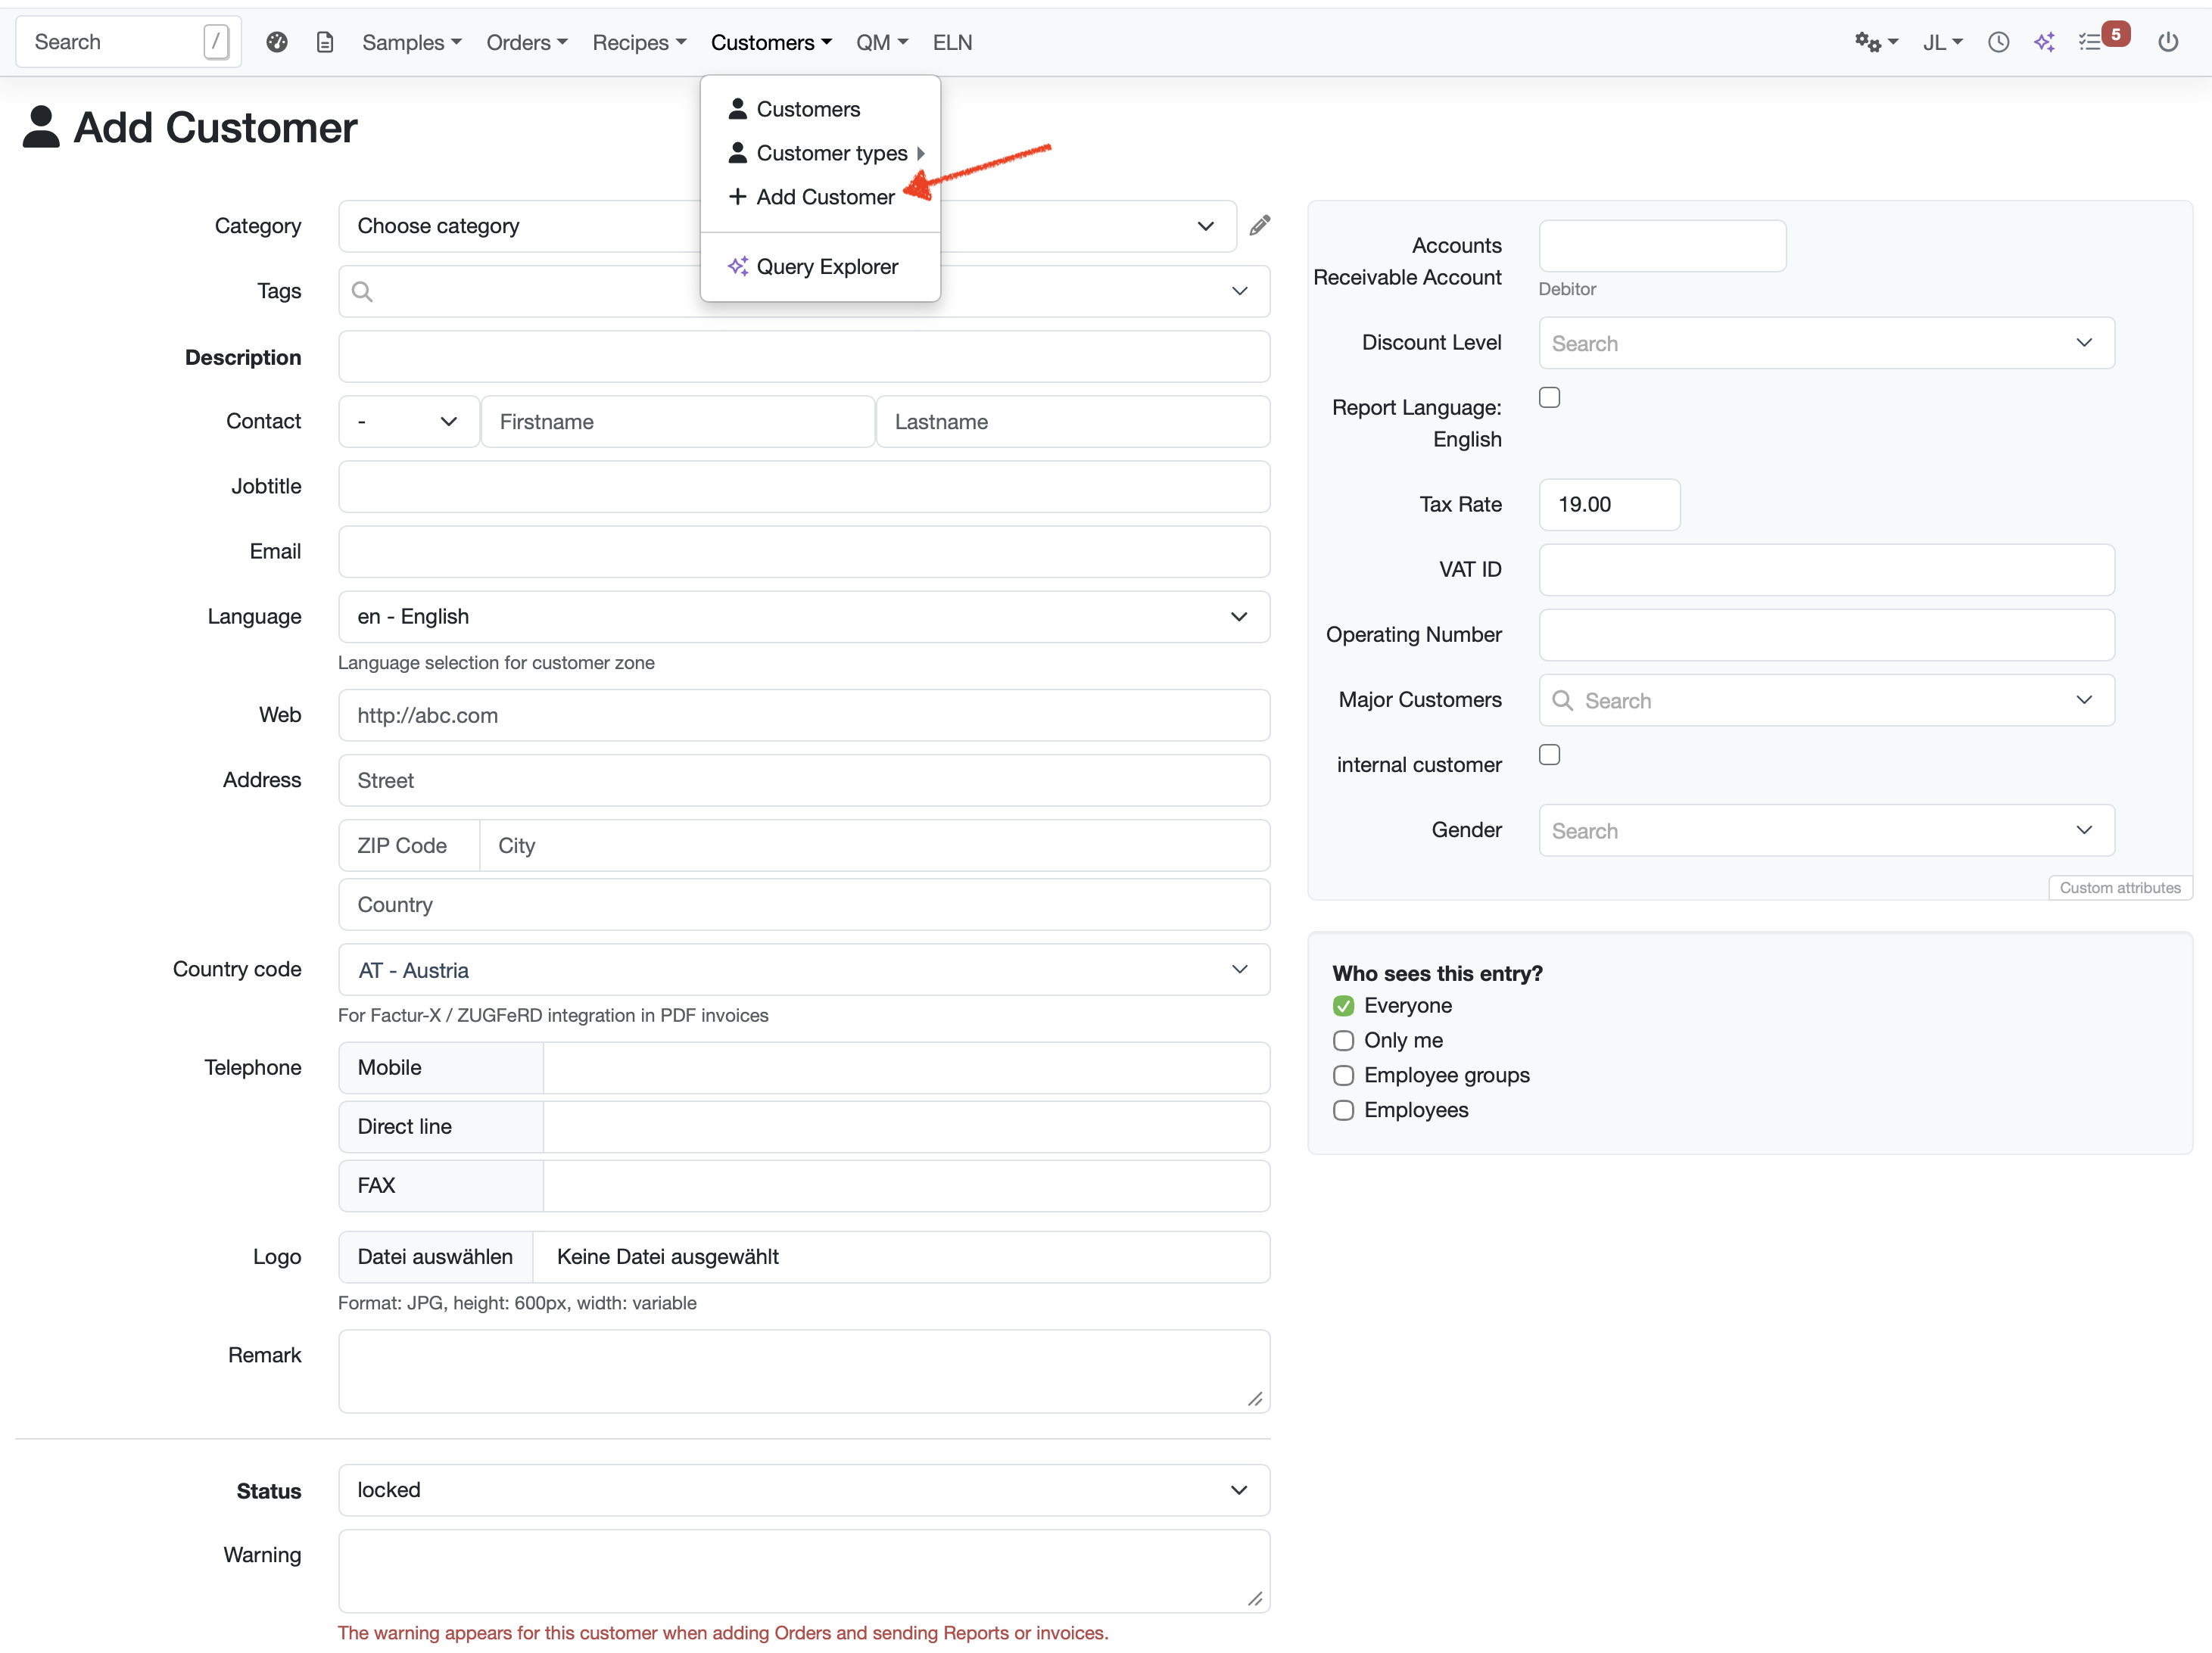
Figure: Add Customer form

  • Category: Select the category of the customer. Categories can be managed using the pencil icon next to it.
  • Tags: Assign tags so that you can filter and find the customer more easily later.
  • Description: Enter the name of the customer.
    Note: Mandatory field.
  • Contact: Select the salutation and enter the first and last name of the main contact person.
  • Jobtitle: Enter the role or position of the main contact person.
  • Email: Store the central email address of the customer.
  • Language: Select the language.
    Note: This language selection applies to the customer zone.
  • Web: Enter the customer's website (e.g. http://abc.com).
  • Address: Enter the street, ZIP code, city and country of the customer.
  • Country code: Select the country code (e.g. AT – Austria).
    Note: The country code is used for the Factur-X / ZUGFeRD integration in the PDF invoices.
  • Telephone: Enter the numbers for mobile and direct line.
  • Logo: Upload a logo using Choose file.
    Note: Format JPG, height 600 px, width variable.
  • Remark: Store additional notes about the customer.

Enabling Personalized Salutations

Since academic titles are used in very different ways by our LDB users, we display them directly in the name of the contact. This allows you to address each customer individually—whether with an academic title (Professor, Doctor, ) or a post-nominal degree (PhD, MSc) or a professional designation (such as the German/Austrian degrees Dipl.-Ing./Dipl.-Ing.in, DI/DIin, Dipl.-Kfm./Dipl.-Kffr.).
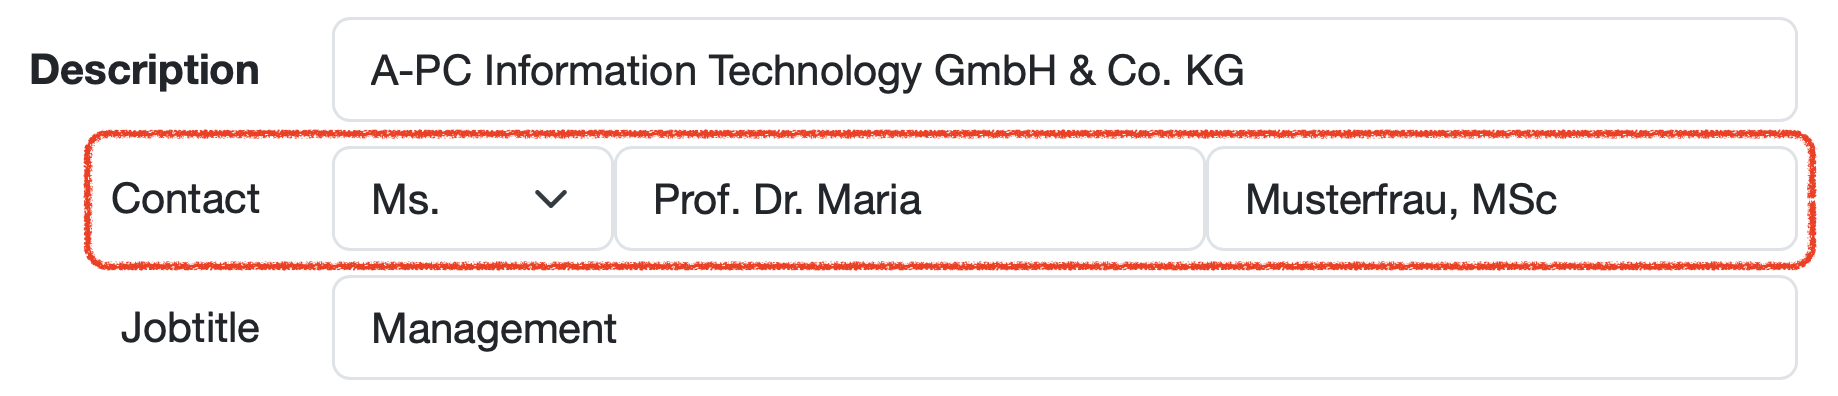
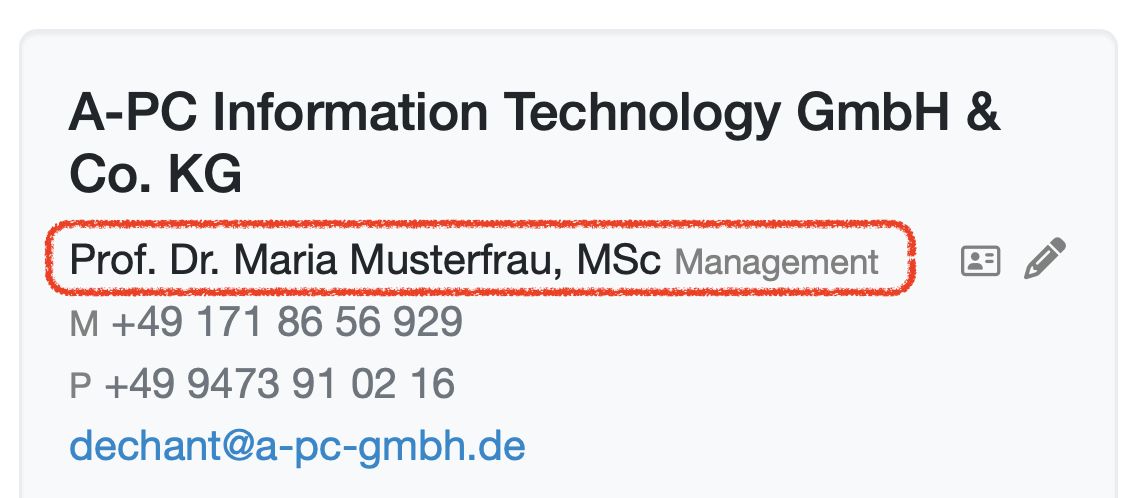
Figure: Academic titles or professional designations in the customer form

Configured attribute fields and customer templates

In addition, you can use configured attribute fields and, if required, create customer templates.

  • Configured attribute fields: The configured attribute fields are set up for you by your customer support. They appear as additional fields in the gray-shaded area on the right-hand side, e.g. Accounts Receivable Account, VAT ID, Operating Number, Major Customers ...
    Further information: Configurable attribute fields in the LABORDATENBANK

  • Customer templates
    Customer templates allow you to create and use dedicated templates for different, frequently used customer types, each with pre-selected attribute fields and default entries.
    Further information: Templates for orders, customers, materials, and other data types

Status and warning

In the lower part of the page you have the option to archive or lock customers, and you can store a warning text.

  • Status: Select the status of the customer (e.g. created). The status also allows you to archive or lock the customer.
    Note: Mandatory field.
    Further information: Status management

  • Warning: If required, store a note text. It appears in red for this customer when adding orders as well as when sending reports and invoices, e.g. Attention: customer is in default of payment.

Info: After you have saved the customer, you can add further contacts to this customer (see guide: Add / Edit / Delete contact persons at customers).
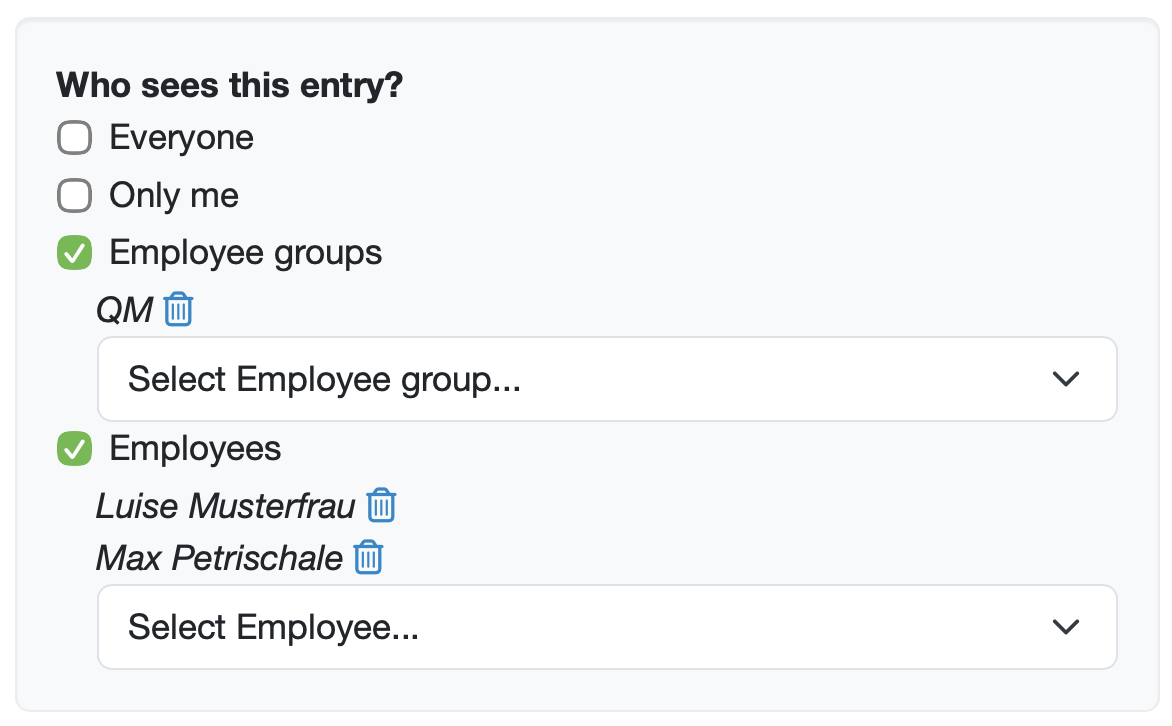
Setting access rights per customer

  • Who sees this entry?: Define the visibility of the customer:
    • Everyone: The customer is visible to all employees.
    • Only me: The customer is visible to you only.
    • Employee groups: The customer is visible to the selected groups.
    • Employees: The customer is visible to the selected employees.

Figure: Who sees this entry?

Numbering system for customers

The LDB assigns the numbers for newly created customers according to a configurable pattern. This allows the numbering to be adapted to many requirements – from a simple sequential number through to a format that contains a date or further details about the customer.

Note: The number format is configured centrally by your customer support as part of the onboarding.

What options are available?

A customer number can be composed of various building blocks:

  • Sequential counter: Each new customer number is incremented automatically – either with a fixed number of digits and leading zeros (e.g. 0001) or without zeros.
  • Date information: The year, month, day or calendar week of the creation date can be included in the number, so that the period of registration is directly recognizable.
  • Fixed letters and characters: Prefixes such as K for customer as well as separators (e.g. -, /, .) provide a consistent, easily readable format.
  • Details from the customer record: The assigned customer category or a configured attribute field of the customer can be adopted in full or in part in order to generate meaningful customer numbers.
  • Grouping of the counter: You can define the range within which the counter restarts – e.g. annually, monthly or weekly – or, alternatively, run it continuously across several years.
  • Date shift: If your fiscal year differs from the calendar year, the year boundary relevant for the numbering can be shifted by a certain number of months – e.g. so that the year only begins on August 1, or so that it already begins on December 1.

Examples

  • Simple sequential number: K0001, K0002, K0003 …
  • With year: K26-0001, K26-0002 … (the two-digit year is part of the number)
  • Year and calendar week with weekly reset of the counter: 2026.16-0001, 2026.16-0002 … and in the following week 2026.17-0001
  • Continuous numbering across several years: The count does not restart at the turn of the year but continues sequentially.

Note: Details that are only added automatically after a customer has been created (e.g. via evaluation triggers) are not yet available at the time the number is assigned and can therefore not be part of the number.


Edit customer

  • Open the customer management under: Navigation bar → Customers → Customers. If required, use the search function to find the customer faster.
  • Click on the blue-highlighted name of the customer. Then click on the orange Edit customer button at the top right.
  • Or click on the gray pencil icon to the right of the customer's name when you are in the customer management.

Access for the customer zone

Once a customer has been saved, an access for the customer zone can be created or managed.
Further information: Activating the Customer Zone


Merge customers

If a customer was created twice, you can merge it with the customer you want to keep.

  • In the edit view, click on Merge customers in the right-hand area.

Further information: Merging duplicate customers


Archive/lock customer

Instead of deleting a customer, you can archive or lock it – this way, linked data is retained.

  • Set the customer to the corresponding archived or locked status in the Status field.

Delete customer

A customer can only be deleted if there is no linked data (e.g. orders). Otherwise, archiving is required.
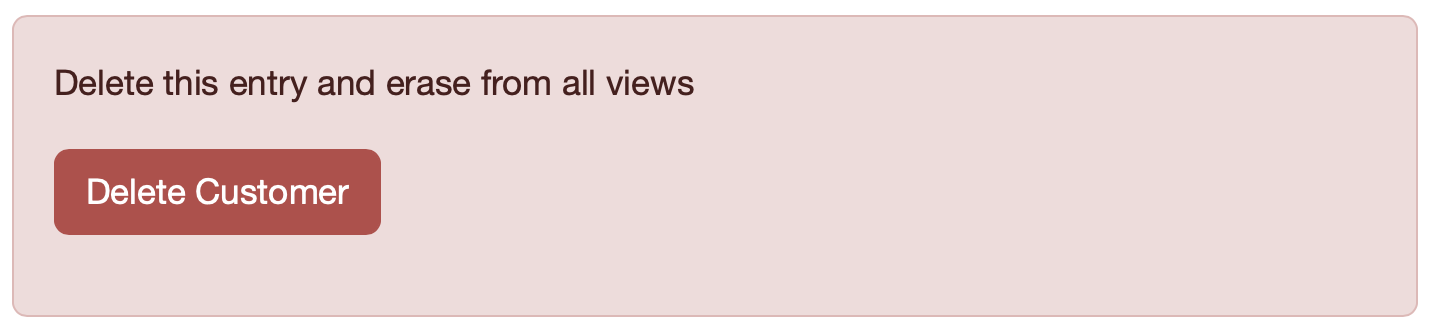
  • In the edit view, click on Delete customer in the red area at the bottom.

Figure: Delete customer


Related topics:

Last change: 07/29/26

General information

Orders

Samples

PDF templates

Employees

Assets

Recipes

Reports

Report table editor

Interfaces

Kompetenzen

AI functions

Introductory phase

Query reports

Templates

Customers

Client zone (optional)

Offers

Invoices

Parameters

Calculating with parameters

Webservices

Transformationscode

Test plans / limit values / specifications

Documents control

Material

Questions and answers

Equipment

Trainings

8D-report

Others

Supplier evaluation

File management

Processes