To open the detail view of an order, follow this path:
Navigation bar → Orders → Orders → Click on the number or name of the desired order
You always cam use the search functions, to find a specific order quickly and precisely.
Note: The exact labels of the menu items may differ depending on the configuration of your LDB. Only populated areas or areas enabled for you are shown.
The detail view bundles all essential information of an order and provides the related data via tabs. It allows you to:
Note: Which tabs and areas are shown depends on the configuration, permissions and available data. Only populated areas or areas enabled for you are shown. The naming of the tabs can also be configuration-dependent.
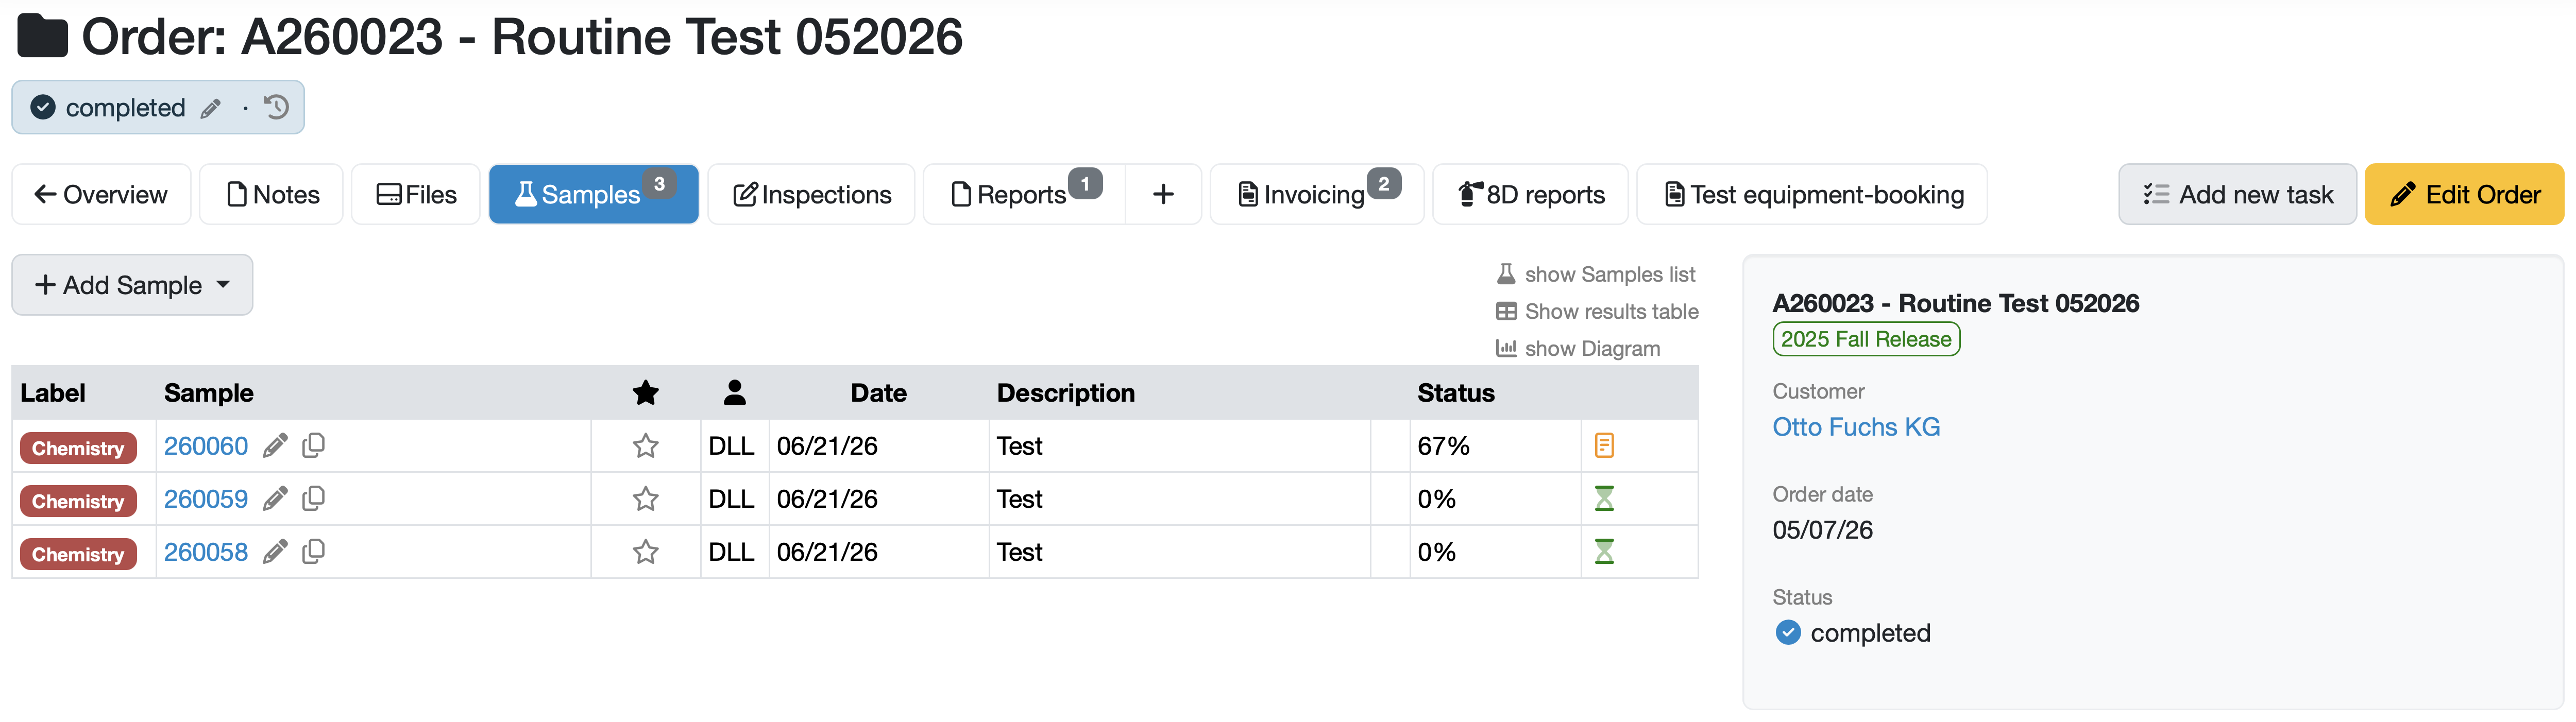
Figure: Detail view of an order (tab Samples active)
In the header area you see the order number and the name of the order as well as the current status.
Below the header area you find the tab menu. Use the tabs to switch between the data areas belonging to the order. The small number (badge) on a tab shows the number of existing entries (e.g. Samples 3, Reports 1, Invoicing 2).
| Tab | Description |
|---|---|
| Overview | Returns to the order overview (list). |
| Notes | Notes on the order. Notes can also be sent to the order by e-mail. |
| Files | Uploaded documents and attachments. Files can be added via drag-and-drop. |
| Samples | Samples recorded for the order, incl. functions for creating samples and opening the results table and the diagram. |
| Inspections | Inspections belonging to the order. (Industry-specific configuration) |
| Reports | Reports on the order. Use the plus symbol (+) next to the tab to create a new report directly. |
| Invoicing | Price list items of the order; add items, have them suggested and assign them to an invoice. |
| 8D reports | Complaints/problems recorded for the order. |
| Test equipment-booking | Bookings of test equipment assigned to the order. |
To the right of the tab menu you find two additional functions:
The content area shows the content of the currently selected tab. The active tab is highlighted in blue.
Content area tab Samples:
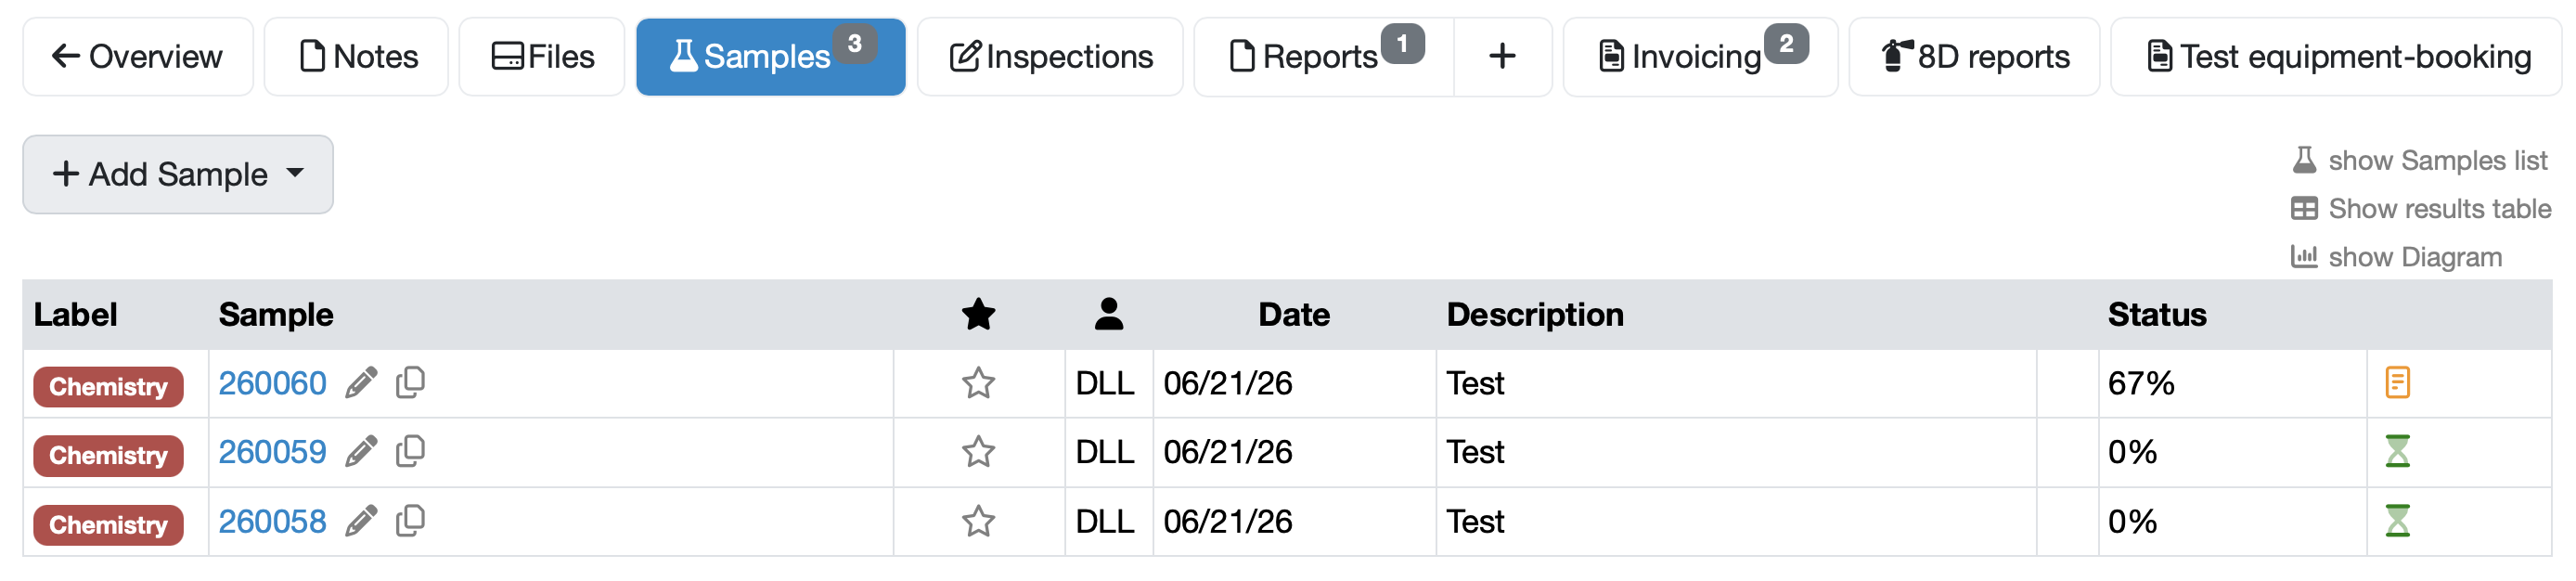
Figure: Tab with content area Samples in the detail view of an order
Content area tab Reports:

Figure: Tab with content area Reports in the detail view of an order
Content area tab_Invoicing_:
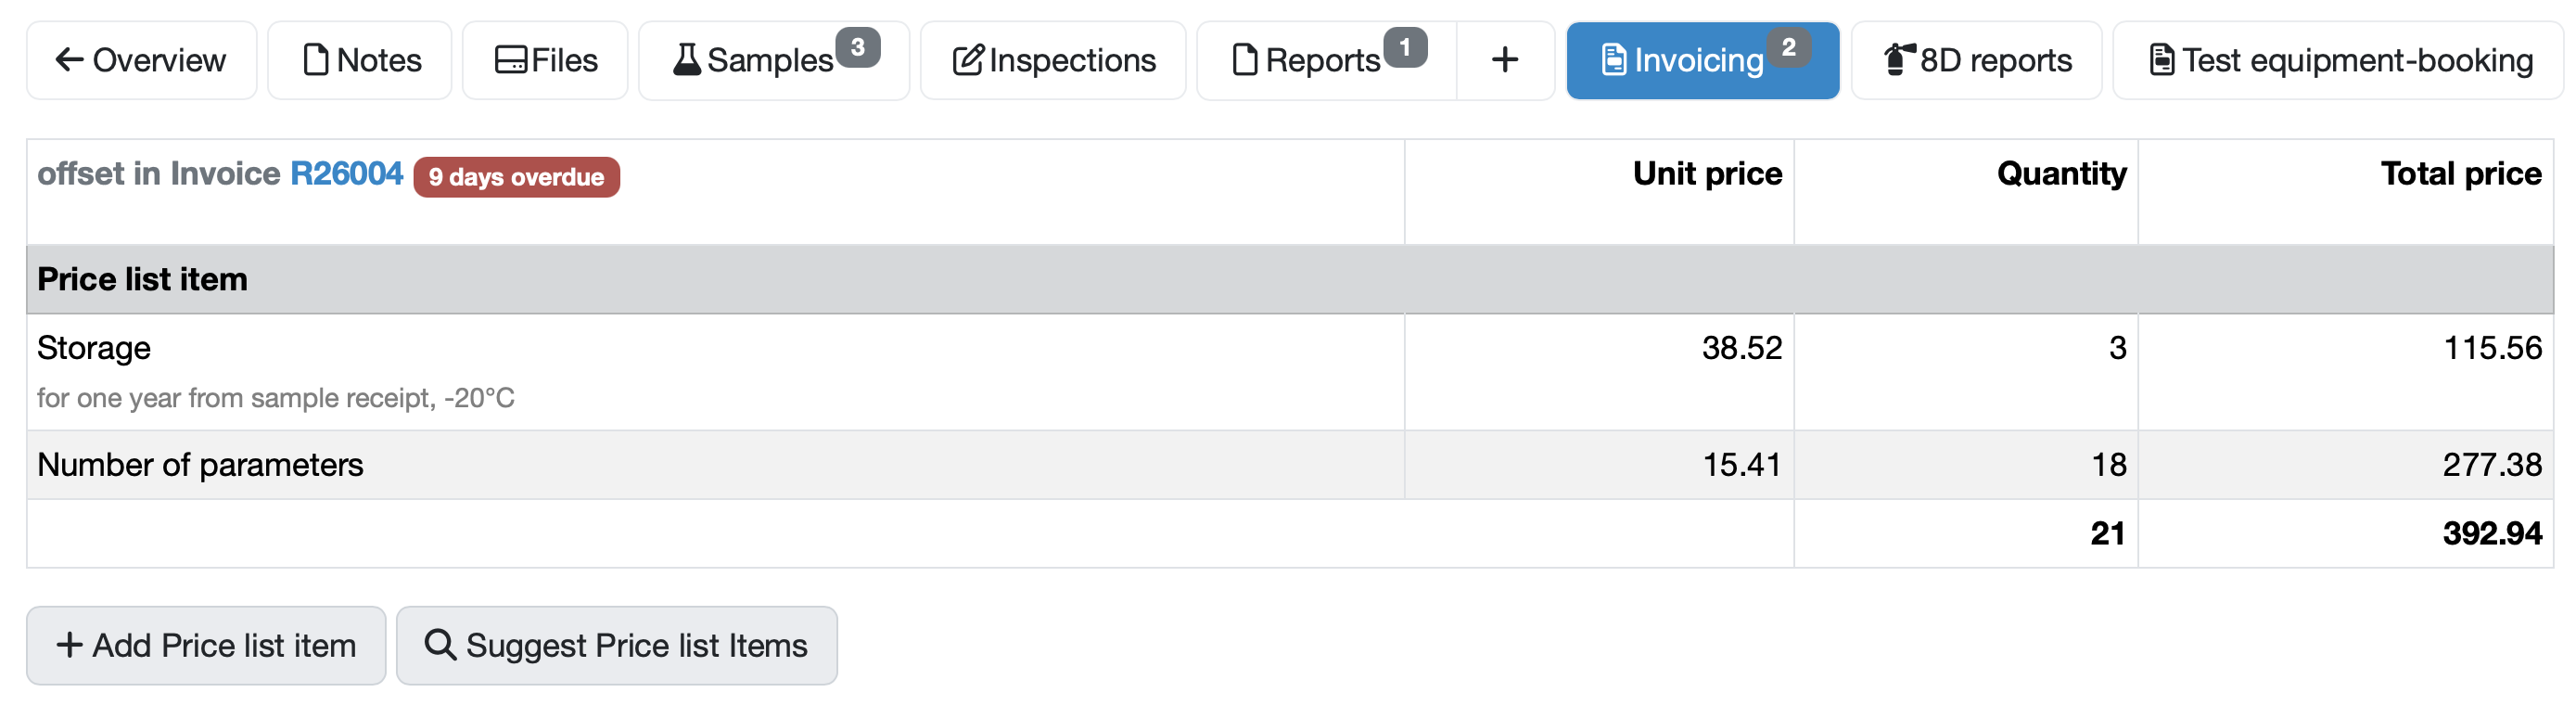
Figure: Tab with content area Invoicing in the detail view of an order
Note: If an order is assigned to an already paid invoice, the price list items can no longer be changed.
To the right of the content area, the attributes of the order and – depending on the configuration and available data – supplementary areas are displayed.
| Entry | Description |
|---|---|
| Order name | Order number and name (e.g. A260023 – Routine Test 052026). |
| Tags | Tags assigned to the order (e.g. 2025 Fall Release). |
| Customer | Assigned customer as a clickable link. Any stored restriction note is shown in red. |
| Project | Linked project as a link, if available. |
| Order date | Date of the order (e.g. 05/07/26). |
| Description | Free-text description of the order, if recorded. |
| Status | Current order status (e.g. completed). |
Note: Depending on the available data and configuration, further entries may appear, e.g. configured attributes (additional fields).
In the side area, additional actions are available – depending on permission and configuration – including Copy Order, Evaluations, Send order confirmation and opening worksheets.

Figure: Edit order
Further information: Create/edit/delete ORDER
Last change: 08/21/26
General information
Supplier evaluation
Material
Employees
Customers
Orders
Samples
PDF templates
Assets
Recipes
Reports
Report table editor
Interfaces
AI functions
Introductory phase
Query reports
Templates
Client zone (optional)
Offers
Invoices
Parameters
Calculating with parameters
Webservices
Transformationscode
Test plans / limit values / specifications
Documents control
Questions and answers
Equipment
Trainings
8D-report
Others
File management
Processes