Open the station management via:
Navigation bar → Samples → Stations
The functions for managing stations in the LDB are described below.
The systematic station configuration enables efficient sample tracking and optimized laboratory workflows with full traceability in your LDB. A station represents a physical storage or processing location in the lab (e.g. a freezer, a room or a storage box) and is used for checking samples in and out – also via QR code scanning.
The station enables:
Stations can be flexibly adapted to different use cases and are displayed differently depending on the configuration:
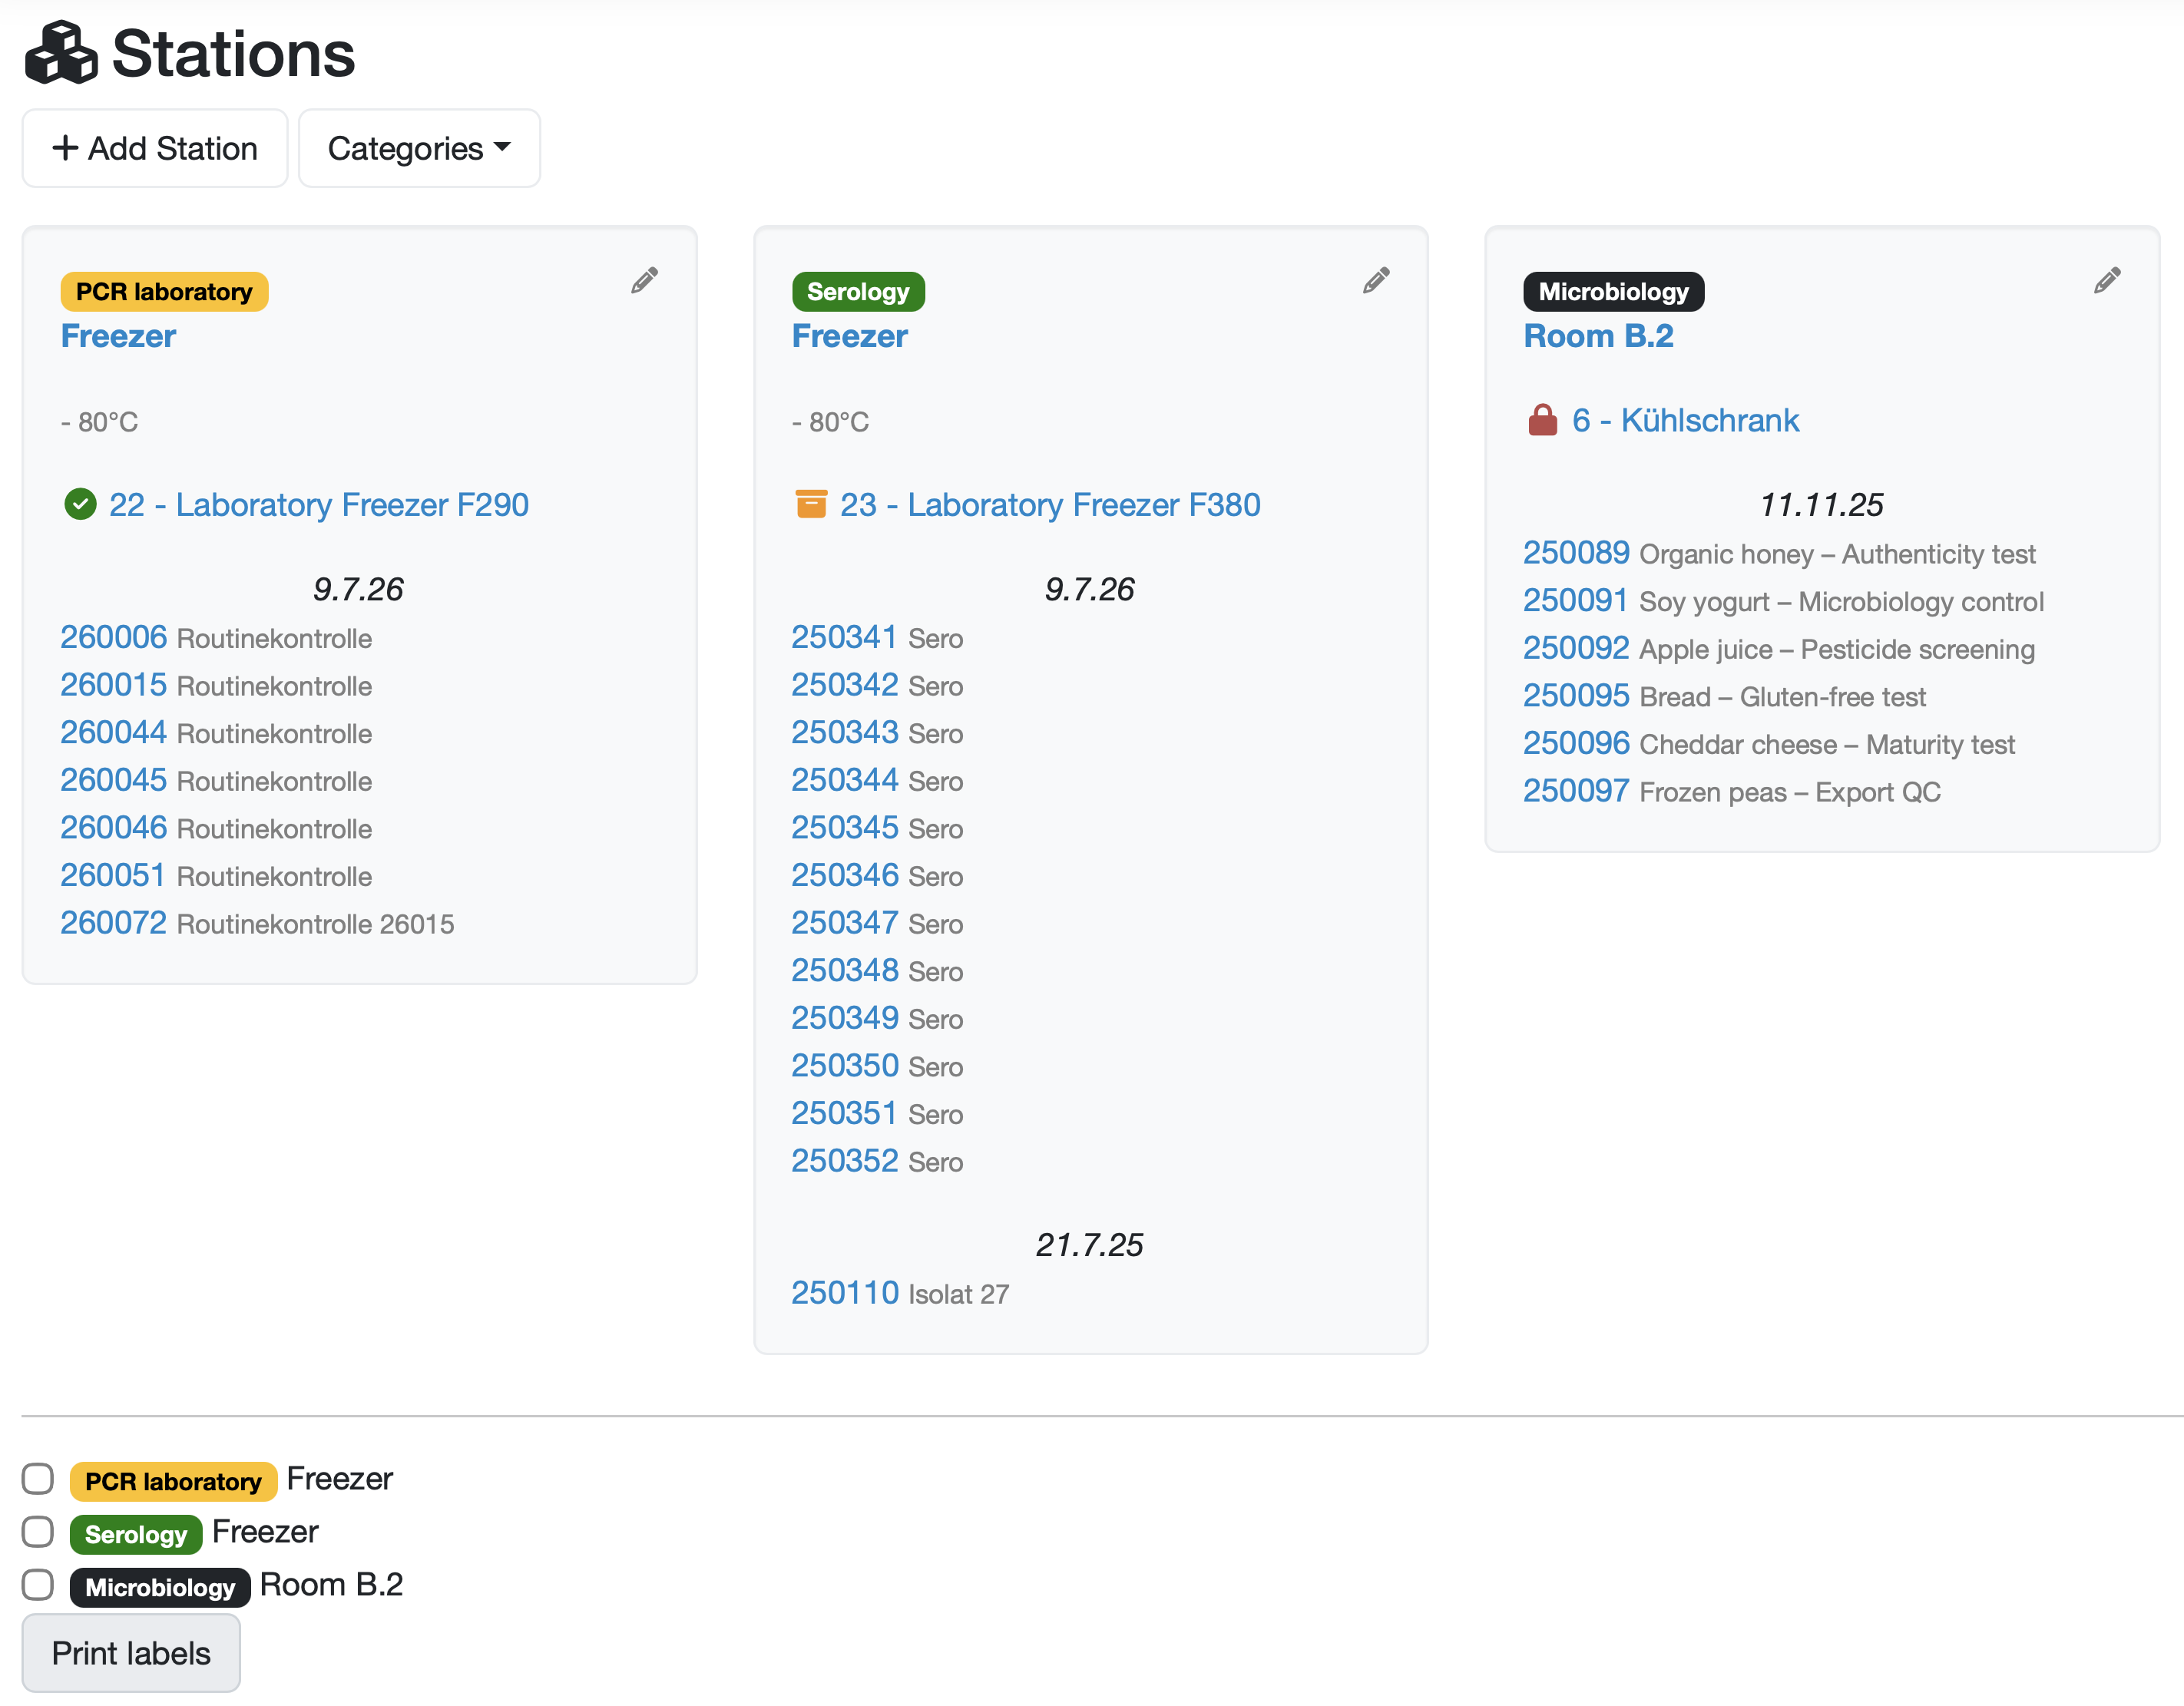
Figure: Overview of the stations with different categories and checked-in samples
The stations are displayed as tiles. The following table describes the elements of a station tile.
| Element | Description |
|---|---|
| Category | Colored label of the category for visual grouping. Configuration-dependent. |
| Station name | Name of the station highlighted in blue. Clicking on it opens the detail view of the station. |
| Description | Additional information about the station. |
| Linked test equipment/device | Link highlighted in blue to the assigned test equipment or laboratory device. The preceding icon indicates the current status of the device. |
| Checked-in samples | List of checked-in samples grouped by check-in date, with the sample number (link) and designation highlighted in blue. |
| Pencil icon | Top right of the tile; opens the station for editing. |
Note: All texts highlighted in blue in the overview are clickable links to the respective data types (station, sample, test equipment). Some elements are always present, others are configuration-dependent.

Figure: Button for creating a new station
Further information: Create / edit / delete station
Change the data of an already recorded station via the editing function.
Further information: Create / edit / delete station
Further information: Book samples into a station
Generate labels for one or more stations.
Within a station, the checked-in samples are displayed grouped chronologically by check-in date (with date separators). For stations with a grid (box), the display is instead position-based in the rows-columns grid.
Last change: 10/14/26
General information
8D-report
Supplier evaluation
Material
Employees
Customers
Orders
Samples
PDF templates
Assets
Recipes
Reports
Report table editor
Interfaces
AI functions
Introductory phase
Query reports
Templates
Client zone (optional)
Offers
Invoices
Parameters
Calculating with parameters
Webservices
Transformationscode
Test plans / limit values / specifications
Documents control
Questions and answers
Equipment
Trainings
Others
File management
Processes