With the laboratory database, you can send your reports directly by e-mail. If you print out the reports and send them by post, you can document this in the laboratory database.
Overview
Reports can be sent directly by email from the LDB. Alternatively, you can log a report that was sent externally (e.g. by post) as sent.
- Send one or more reports directly by email, or mark them as sent (e.g. for postal delivery)
- Adjust the standard text and attachments before sending
- Log the dispatch automatically and track whether and when an email was opened
Navigation
Open the report management via:
Navigation bar → Samples → Reports
Note: The exact naming of the menu items may vary depending on the configuration of your LDB.
Send report by email
Send a single report
- In the report list, click the email icon to the right of the report name.

Figure: Send a single report by email
Send multiple reports
- Select the desired reports via the checkbox to the left of the report name. Use Select all at the bottom of the list to select all listed reports.
- Then click Selected Reports … and choose send in email.
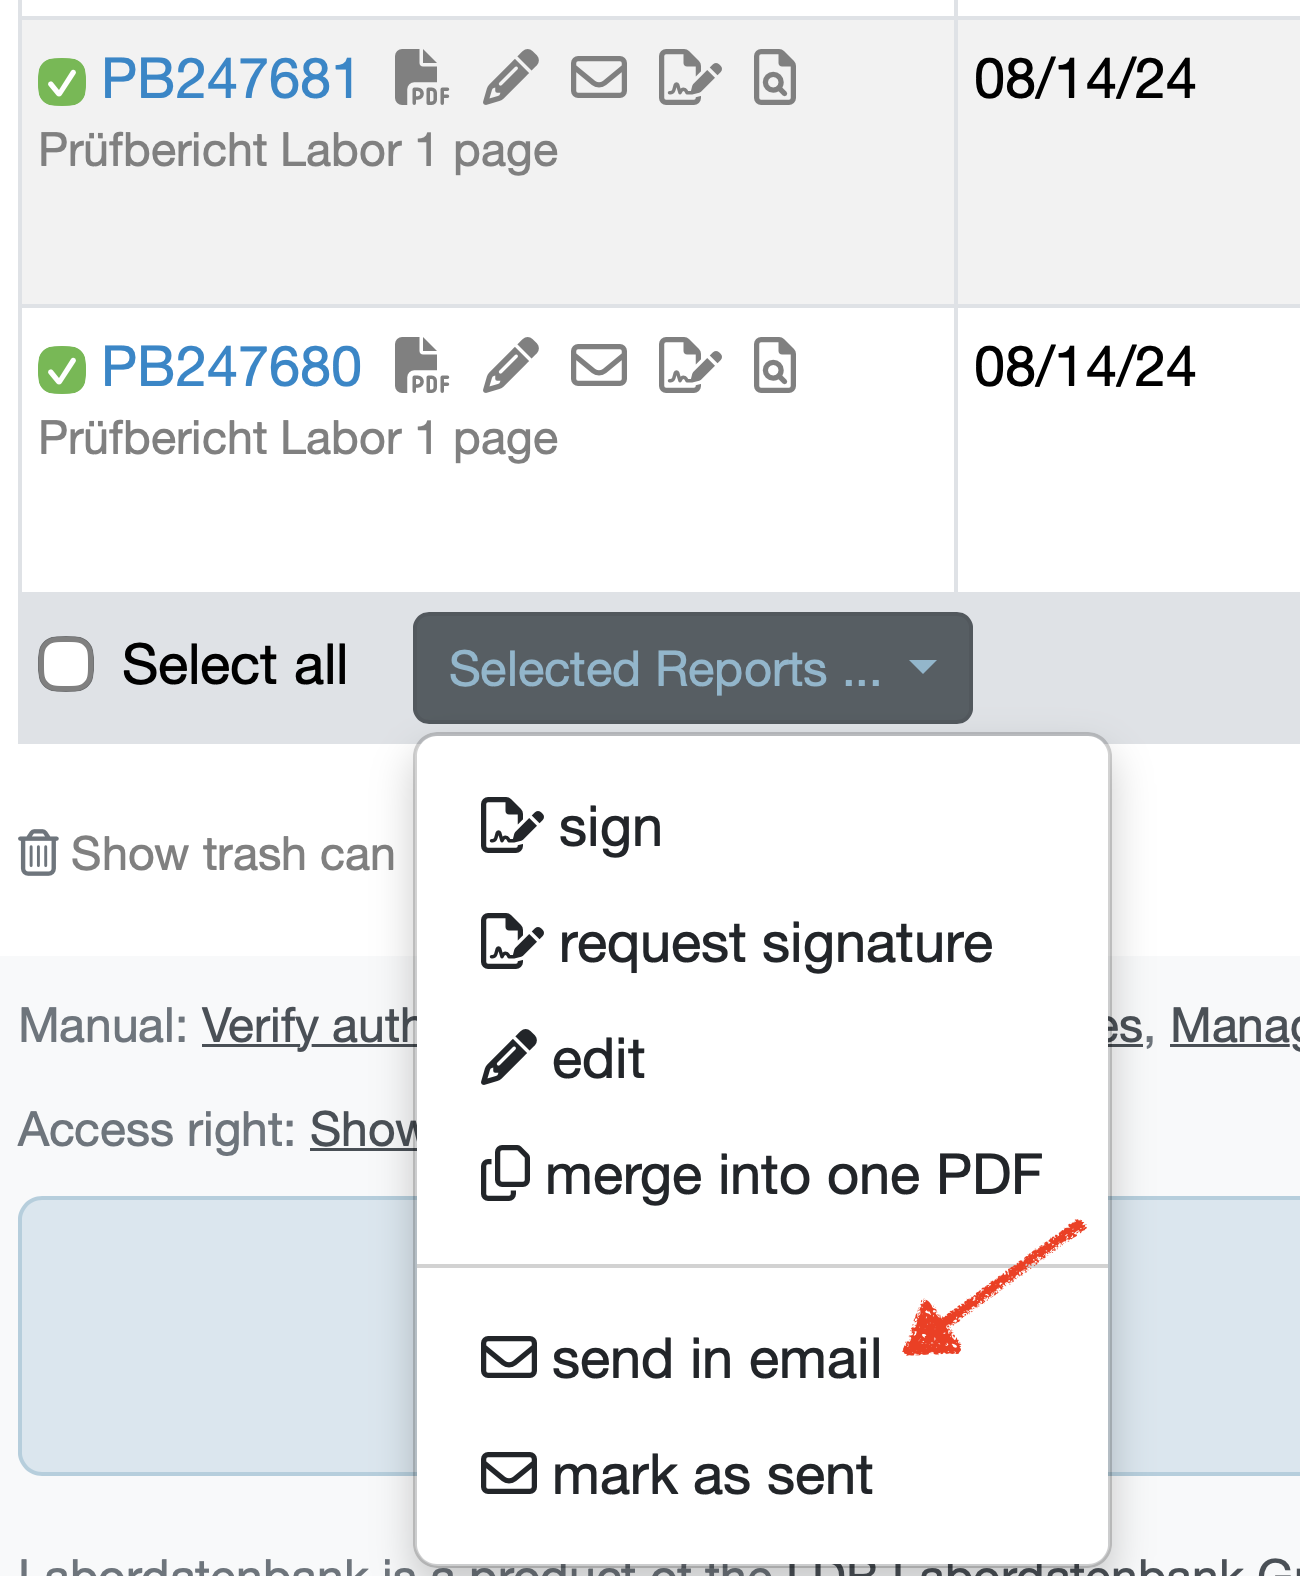
Figure: Send selected reports by email
Email screen
The Send Reports screen then opens with the selected reports as attachments. The following fields are available:
- From: Sender address from which the email is sent. Via the dropdown menu, you can choose between several stored sender addresses if available.
- To: Recipient address. It is pre-filled if stored with the customer.
Note: Multiple recipients are separated by commas. Email addresses stored with the customer can be transferred by clicking the copy symbol next to the respective address in the right-hand block.
- CC / BCC: Optional recipients in copy or blind copy.
- Subject: Subject line of the email (pre-filled by default, individually adjustable).
- Attachment: Shows the selected reports (marked in green) that are attached as PDF. Where available, the signature date and the file size are shown for each report. Via Choose file under Add further attachments, you can attach additional files from your computer.
Note: If the selected reports come from several customers, the warning Reports from different customers appears.
- Text: Message text of the email. It is pre-filled with a standard text and can be adjusted.
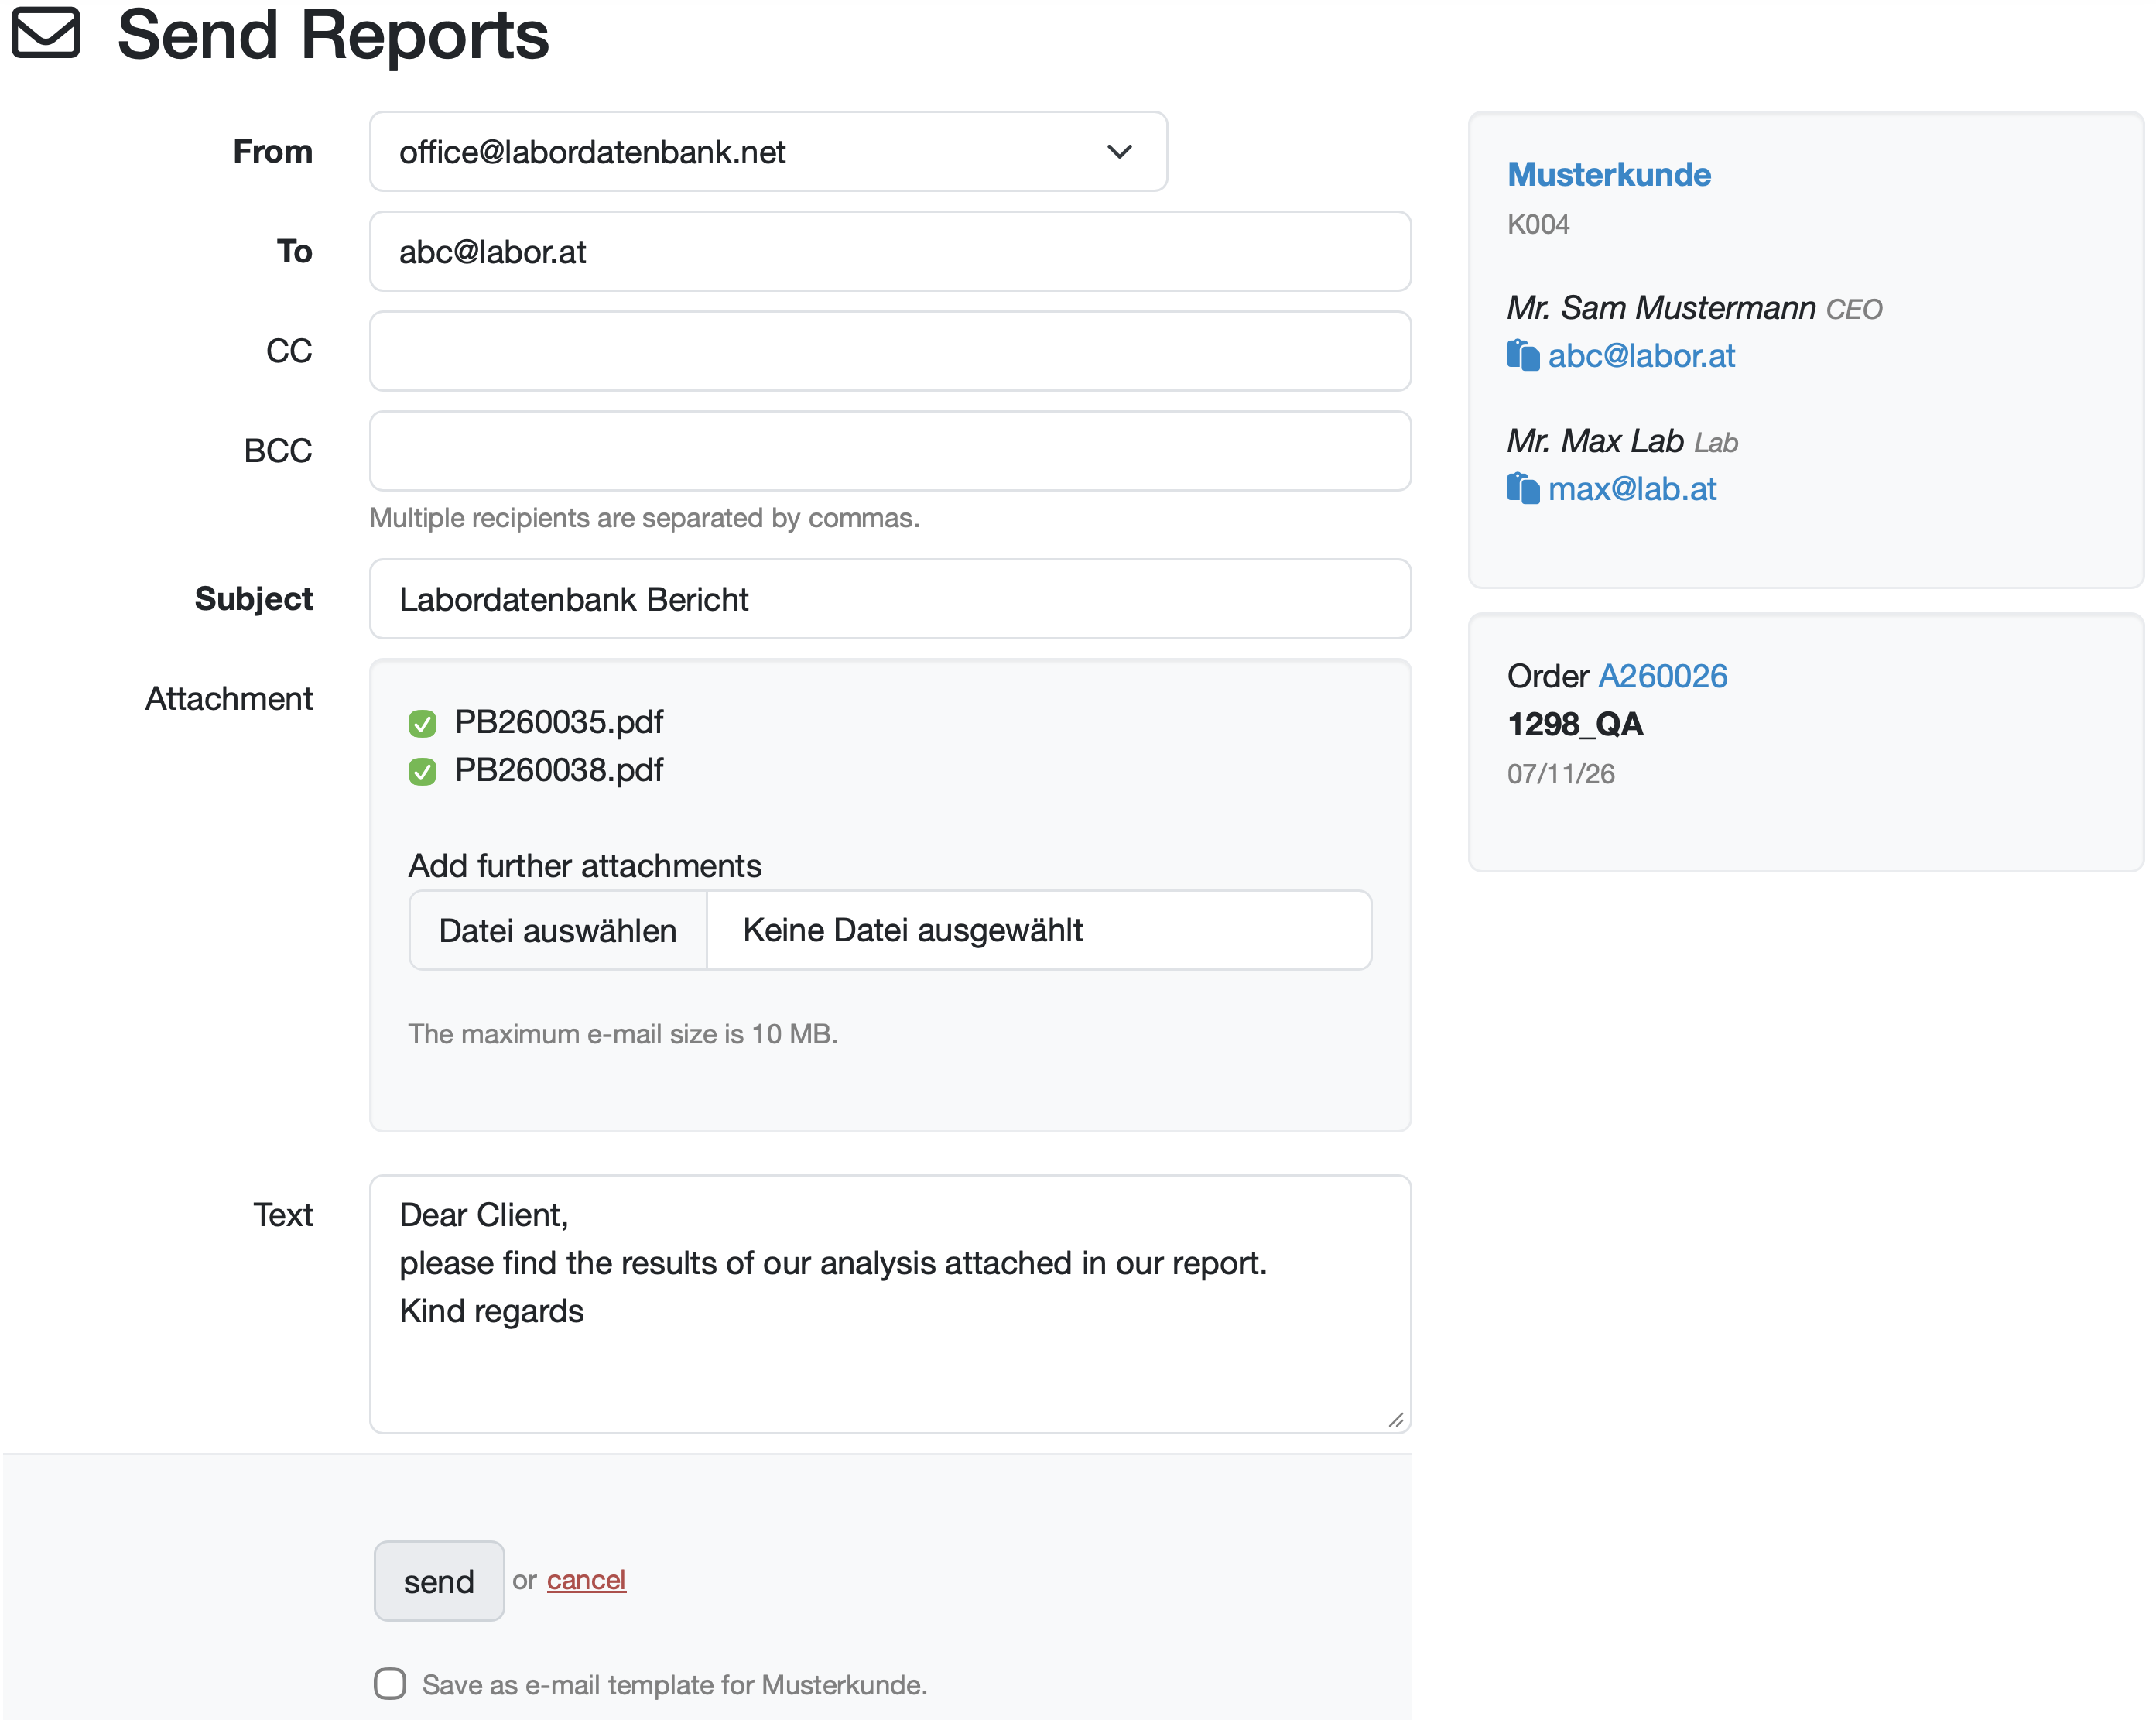
Figure: Send Reports screen with the selected reports
- Click send. The report is sent and automatically marked as sent in the LDB. Use cancel to discard the process.
- Using the Save as e-mail template for customer checkbox, you can store the current email as a template for this customer and reuse it the next time you send.
Customer and order information
To the right of the screen, the associated customer and the linked order are shown. The customer block lists the stored contact persons with their function and their email addresses. Using the copy symbol next to an email address, you transfer it directly into the recipient field. The order number and description in the lower block are shown in blue and lead to the respective detail view when clicked.
The maximum e-mail size is 10 MB. This includes the email content and all attachments. The maximum number of recipients is 20 (including all To, CC and BCC recipients).
If you would like to send larger file attachments or to more than 50 recipients, you can enter your own SMTP account for sending emails in the system settings.
Additional settings for sending emails
Via the system settings, you can preconfigure the default behaviour for sending reports – for example sender and recipient addresses, the subject and text of the sending email, or whether only signed reports may be sent.
You can find these settings under:
Navigation bar → Settings → System settings → Reports → Send reports section
Mark report as sent
If you send a report independently of the LDB (e.g. printed out for postal delivery), you can log the dispatch in the LDB.
- Select the relevant reports via the checkbox.
- Click Selected Reports … and choose mark as sent.
- In the dialog, enter the dispatch date under Sent on and click Save.
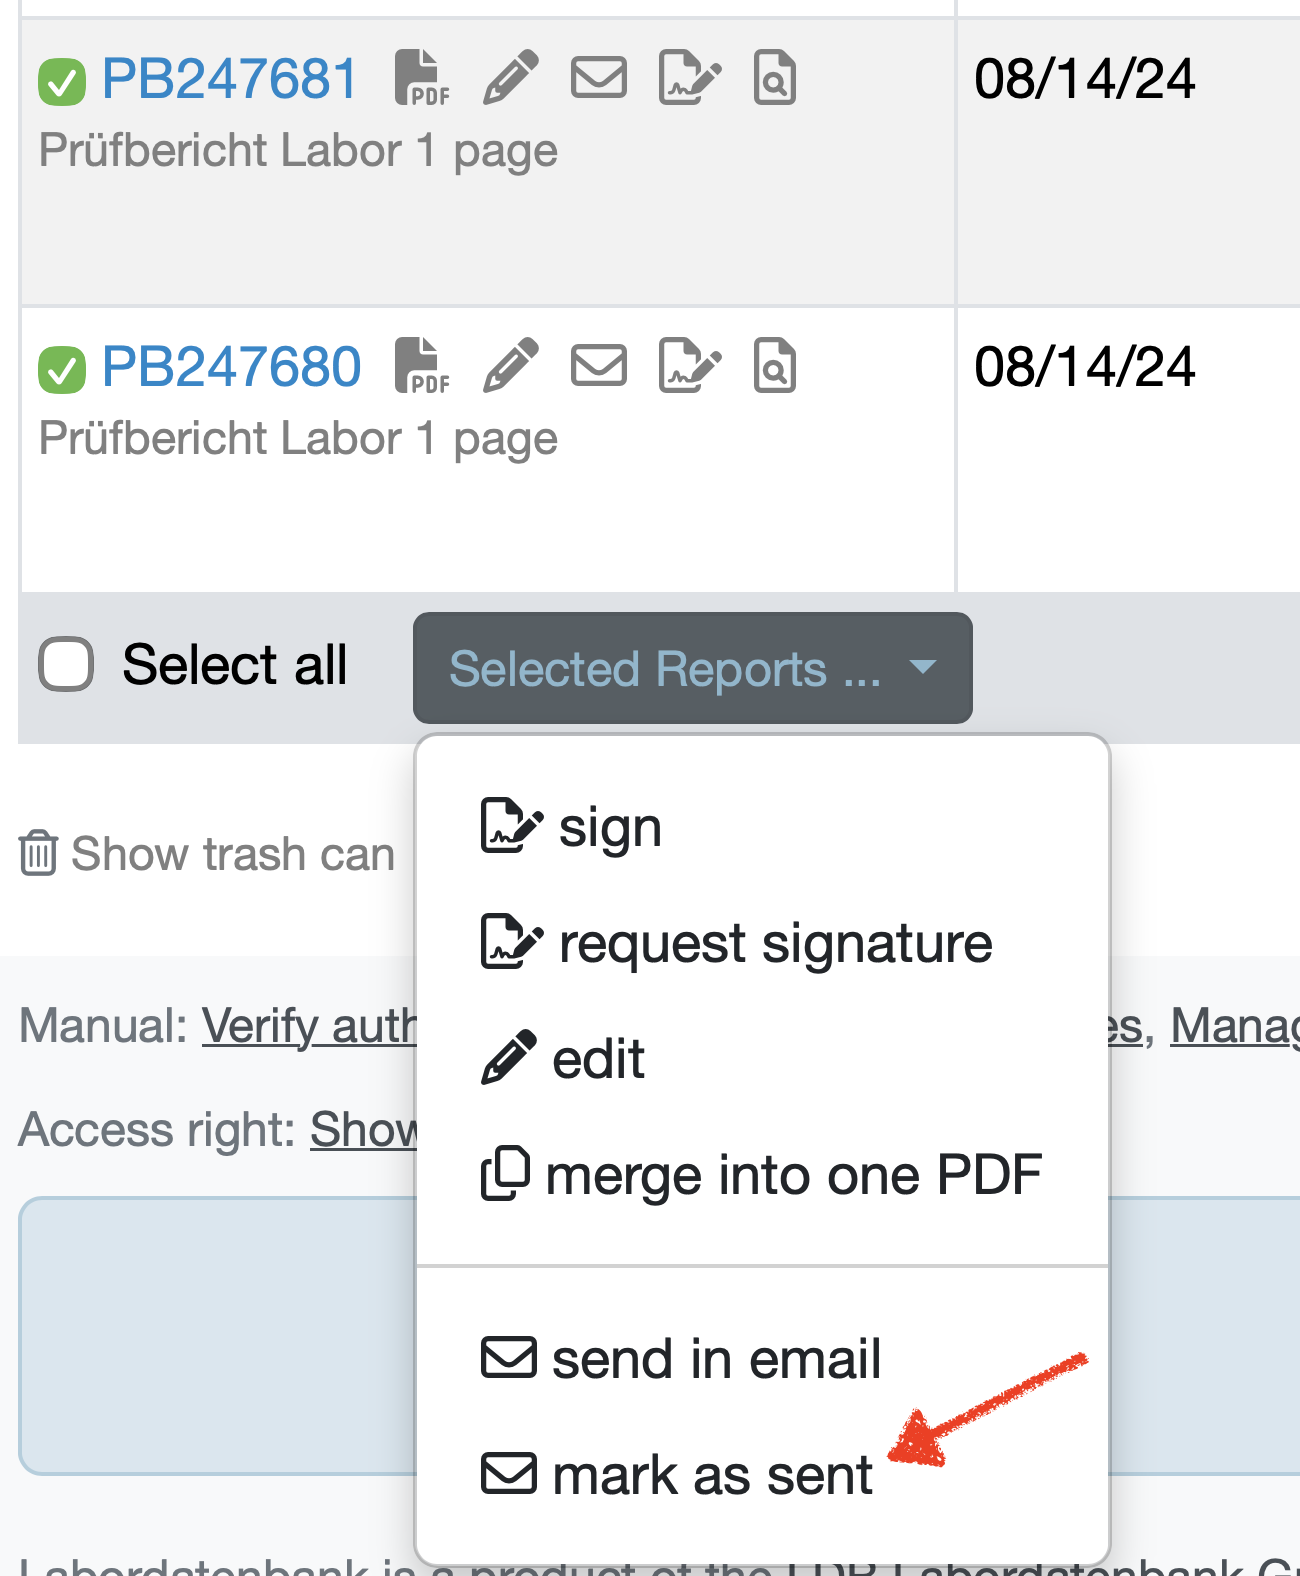
Figure: Mark selected reports as sent
After sending
- The status of the report changes to sent.
- Below the report name, the associated emails are listed with date and recipient. Clicking opens the respective email.
- The icons indicate the delivery status:
- Green envelope icon: The email was opened (open tracking). Details appear on mouseover.
- Red warning icon: An error occurred during sending. The error message appears on mouseover.
- Grey envelope icon: The email was sent.
- Using the status filter at the top of the report management, you can filter specifically for sent or not-yet-sent reports.
Related Topics: