Activating the Customer Zone

The Customer Zone provides your clients with a secure area where they can access important information and services. Activation is done individually for each contact associated with a customer. Follow these steps to easily set up the Customer Zone:

Create a new contact for customer zone

To activate the customer zone, please create a contact for the relevant customer if one does not already exist.
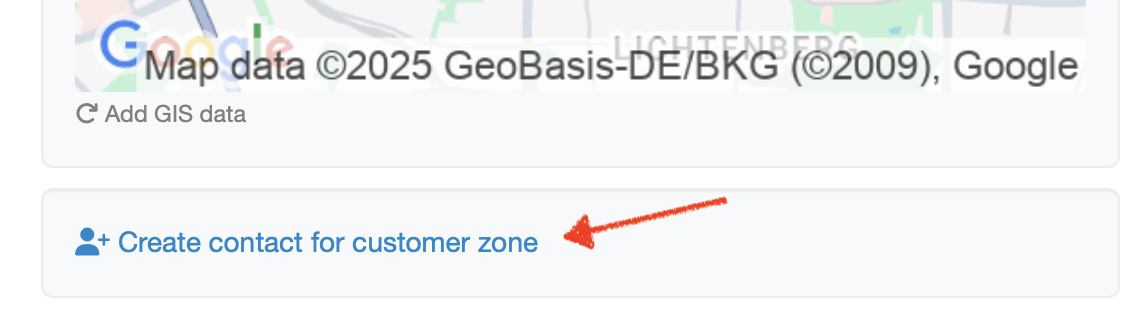
  1. Create contact

  1. Activate customer zone account
  • In the contact, you will find the settings for the customer zone in the right-hand section of the page with a gray background.
  • Click on the “Login Active” checkbox.
  1. Set up login details
  • You can log in to the customer zone with your email address and password.
  • Recommended procedure: Leave the checkbox “Send e-mail for password assignment” marked as suggested. Save the settings and have an email sent for password assignment so that the customer can create a secure password themselves.
  • Alternative: you can assign a password for the customer and communicate it to them.

Activate the customer zone retrospectively for existing contacts

If the contact already exists, you can also activate the customer zone retrospectively:

  1. Edit contact
  1. Activate customer zone account
  • Activate the account for the customer zone in the gray section on the right-hand side of the page as described above in step 2.

Send access data

Provide the customer with the web address for accessing the customer zone.
The web address for your customer zone is https://labordatenbank.com/demo/customers/login

The customer zone is now set up and the customer can access the shared content.


Using the same email address for multiple customers

Each email address can only be assigned once as a login.
If the same email address is to have access to different customer zones (multiple customers), an extension can be integrated into the email address (via using '+').

Example of how the email address max.musterfrau@test.de can be used for multiple customer zones:
The contact for customer A receives the email address max.musterfrau+customerA@test.de
The contact for customer B receives the email address max.musterfrau+customerB@test.de

This extension does not affect the receipt of emails. The emails are still delivered to the same mailbox, but the system can distinguish between the contacts based on the extension.
When resetting the password, everything between the + and the @ is ignored, so that the reset email is always sent to the correct address (in this example, max.musterfrau@test.de).


Edit own contact data in the customer zone

Every contact with an active customer-zone login can edit their own data. Account management makes it possible to:

  • Update name and email address
  • Change password
  • Activate multi-factor authentication (MFA)
  • Add a profile picture
  • Maintain phone numbers (mobile and landline)

As soon as a contact is logged in to their own customer zone, the following path provides the option to edit their own contact data:
Navigation bar → Edit my account


Figure: Edit my account in the customer zone

Once Edit my account has been opened, the form for editing the contact data with the following fields appears:
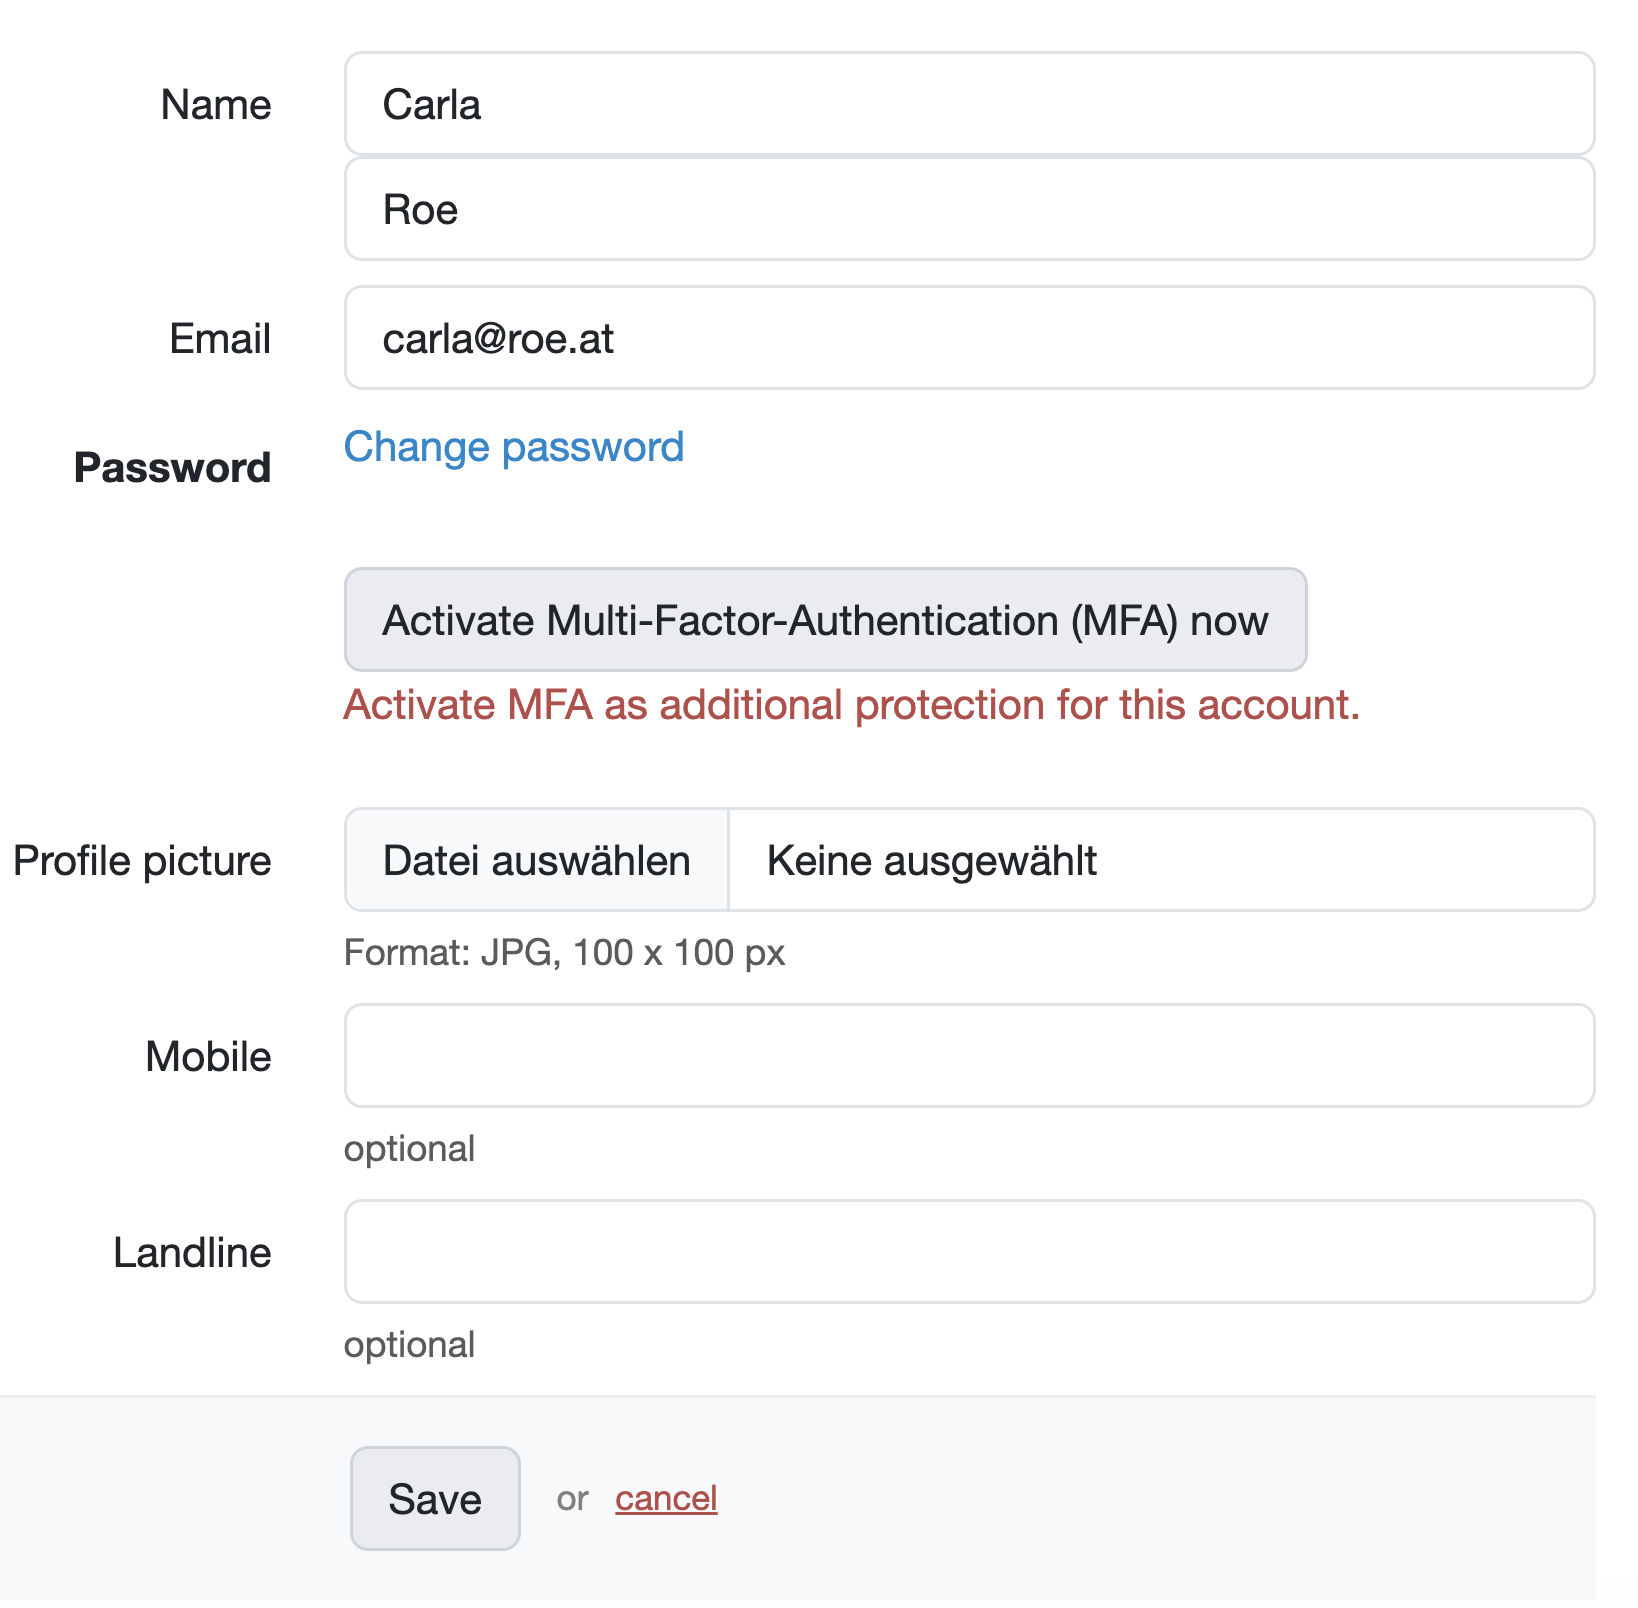
Figure: Editing the own contact data in the customer zone

  • Name: First and last name are entered in the two fields. Both entries are mandatory.
  • Email: The email address is entered here. This field is mandatory and is used, among other things, for logging in.
  • Password: A new password can be set via Change password. If available, the date of the last password change is shown below the link.
  • MFA (Multi-Factor-Authentication): An additional security layer for the account can be set up via Activate Multi-Factor-Authentication (MFA) now. If MFA is already active, the status (MFA activated) is shown here instead.
  • Profile picture: A profile picture can be uploaded via Choose file.
    Note: The image must be in JPG format with a size of 100 × 100 px.
  • Mobile: Optional entry of the mobile number.
  • Landline: Optional entry of the landline number.
  • The changes are applied via the Save button at the bottom of the form.
  • Via cancel, the changes are discarded and the previous view is displayed again.

Our recommendation: Multi-factor authentication (MFA) should be activated as additional protection for the account.

Change own login:
Since the email address entered for the contact is used as the login for signing in to the customer zone, changing the email address in the contact data automatically changes the login accordingly. The new email address is then used for the login.
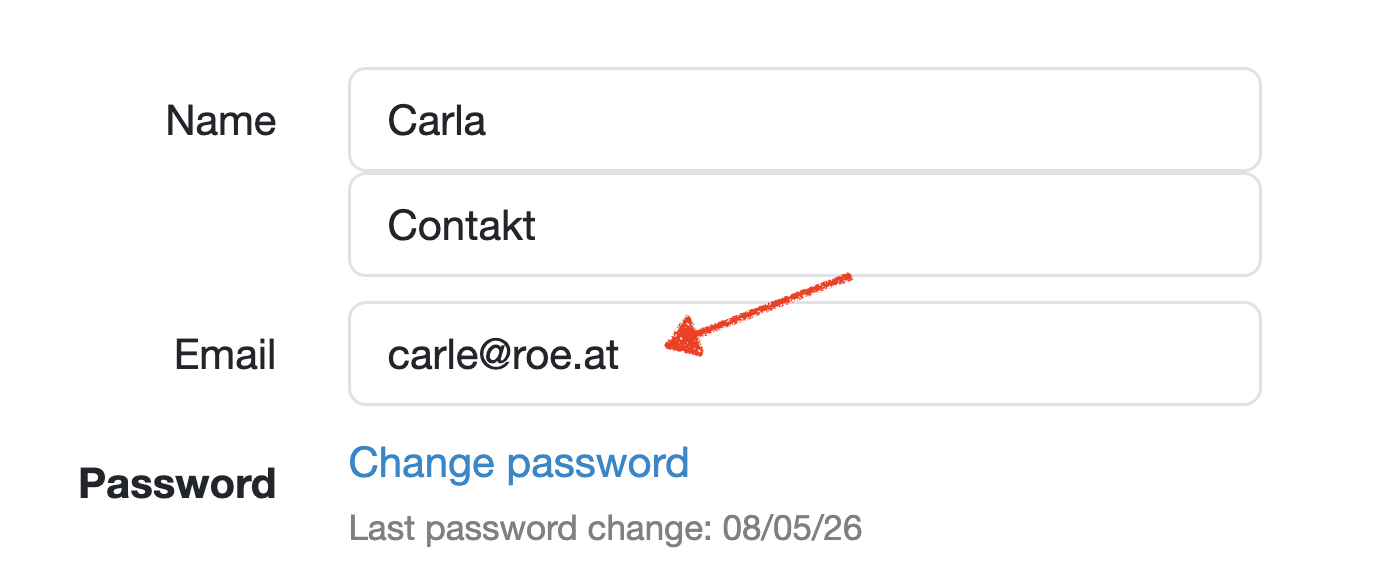

Figure: Change login

Change own password:

Every contact can also change their own password under Edit my account. Clicking Change password opens the mask for entering the current (old) password and the new password.
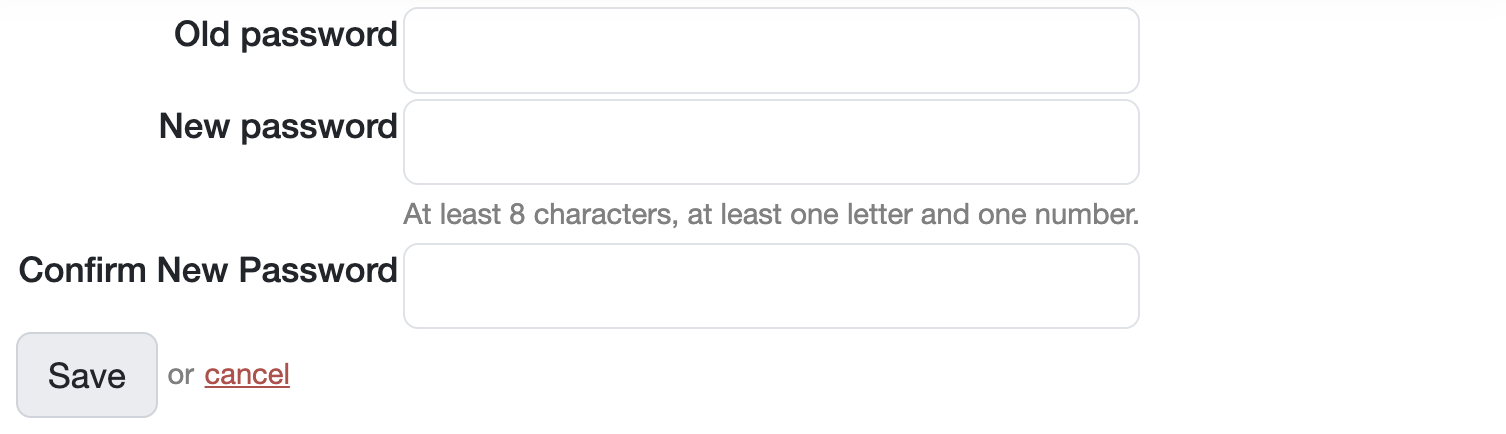
  • Old password: Entry of the current password.
  • New password: Entry of the new password.
    Note: The password must be at least 8 characters long and contain at least one letter and one number.
  • Confirm New Password: Re-entry of the new password for confirmation.
  • Via Save the new password is applied; via cancel the process is discarded.


Figure: Change password

Last change: 08/21/26

General information

Supplier evaluation

Material

Employees

Customers

Orders

Samples

PDF templates

Assets

Recipes

Reports

Report table editor

Interfaces

Kompetenzen

AI functions

Introductory phase

Query reports

Templates

Client zone (optional)

Offers

Invoices

Parameters

Calculating with parameters

Webservices

Transformationscode

Test plans / limit values / specifications

Documents control

Questions and answers

Equipment

Trainings

8D-report

Others

File management

Processes