To create, edit, or delete a station, follow this path:
Navigation bar → Samples → Stations
Under the menu heading, you will find the button for creating a new station in the left section of the page.

Figure: Button for creating a new station
By default, a station contains the following input fields:

Figure: Input screen for creating a station
Figure: Pencil icon for editing a station
The following settings when editing or creating a station are configuration-dependent. Please contact your customer support if you would like to use these functions.

Figure: Activated "Storage station" checkbox in the editing screen
When to use this function:
This function is suitable wherever a fixed storage location needs to be documented in parallel with the current processing location – for example, for retained samples, aliquots, reference and master collections, archives, or long-term storage.
Advantages:

Figure: Configuration of a 9x9 grid in the "Rows x Columns" field
When to use this function:
The grid digitally maps the physical structure of a storage container – such as a cryobox, a rack, or a microtiter plate. Each sample is assigned not only to the station, but also to a unique position (row/column) within it. This function is suitable wherever the exact location of a sample within a container needs to be known – for example, for master and reference collections, aliquot boxes, or the long-term storage of sorted samples.
Once a grid has been configured, a corresponding position matrix for booking samples in and out is available in the station's detail view.
Advantages:
Note: The grid configuration (Rows x Columns) should only be changed with caution if samples have already been booked into positions. Using the grid configuration precludes the standard use of stations without a grid.
For storing ctDNA samples, a station is created as a box with a 9x9 grid. To do this, the values 9 and 9 are entered in the Rows x Columns field.
In the station's detail view, the individual grid positions are then available as input fields. Samples can be booked in directly at a position by scanning or entering the sample number. Below the grid, the booked-in samples are displayed with the date, processor, and link to the sample. The station can be accessed directly via the QR code.
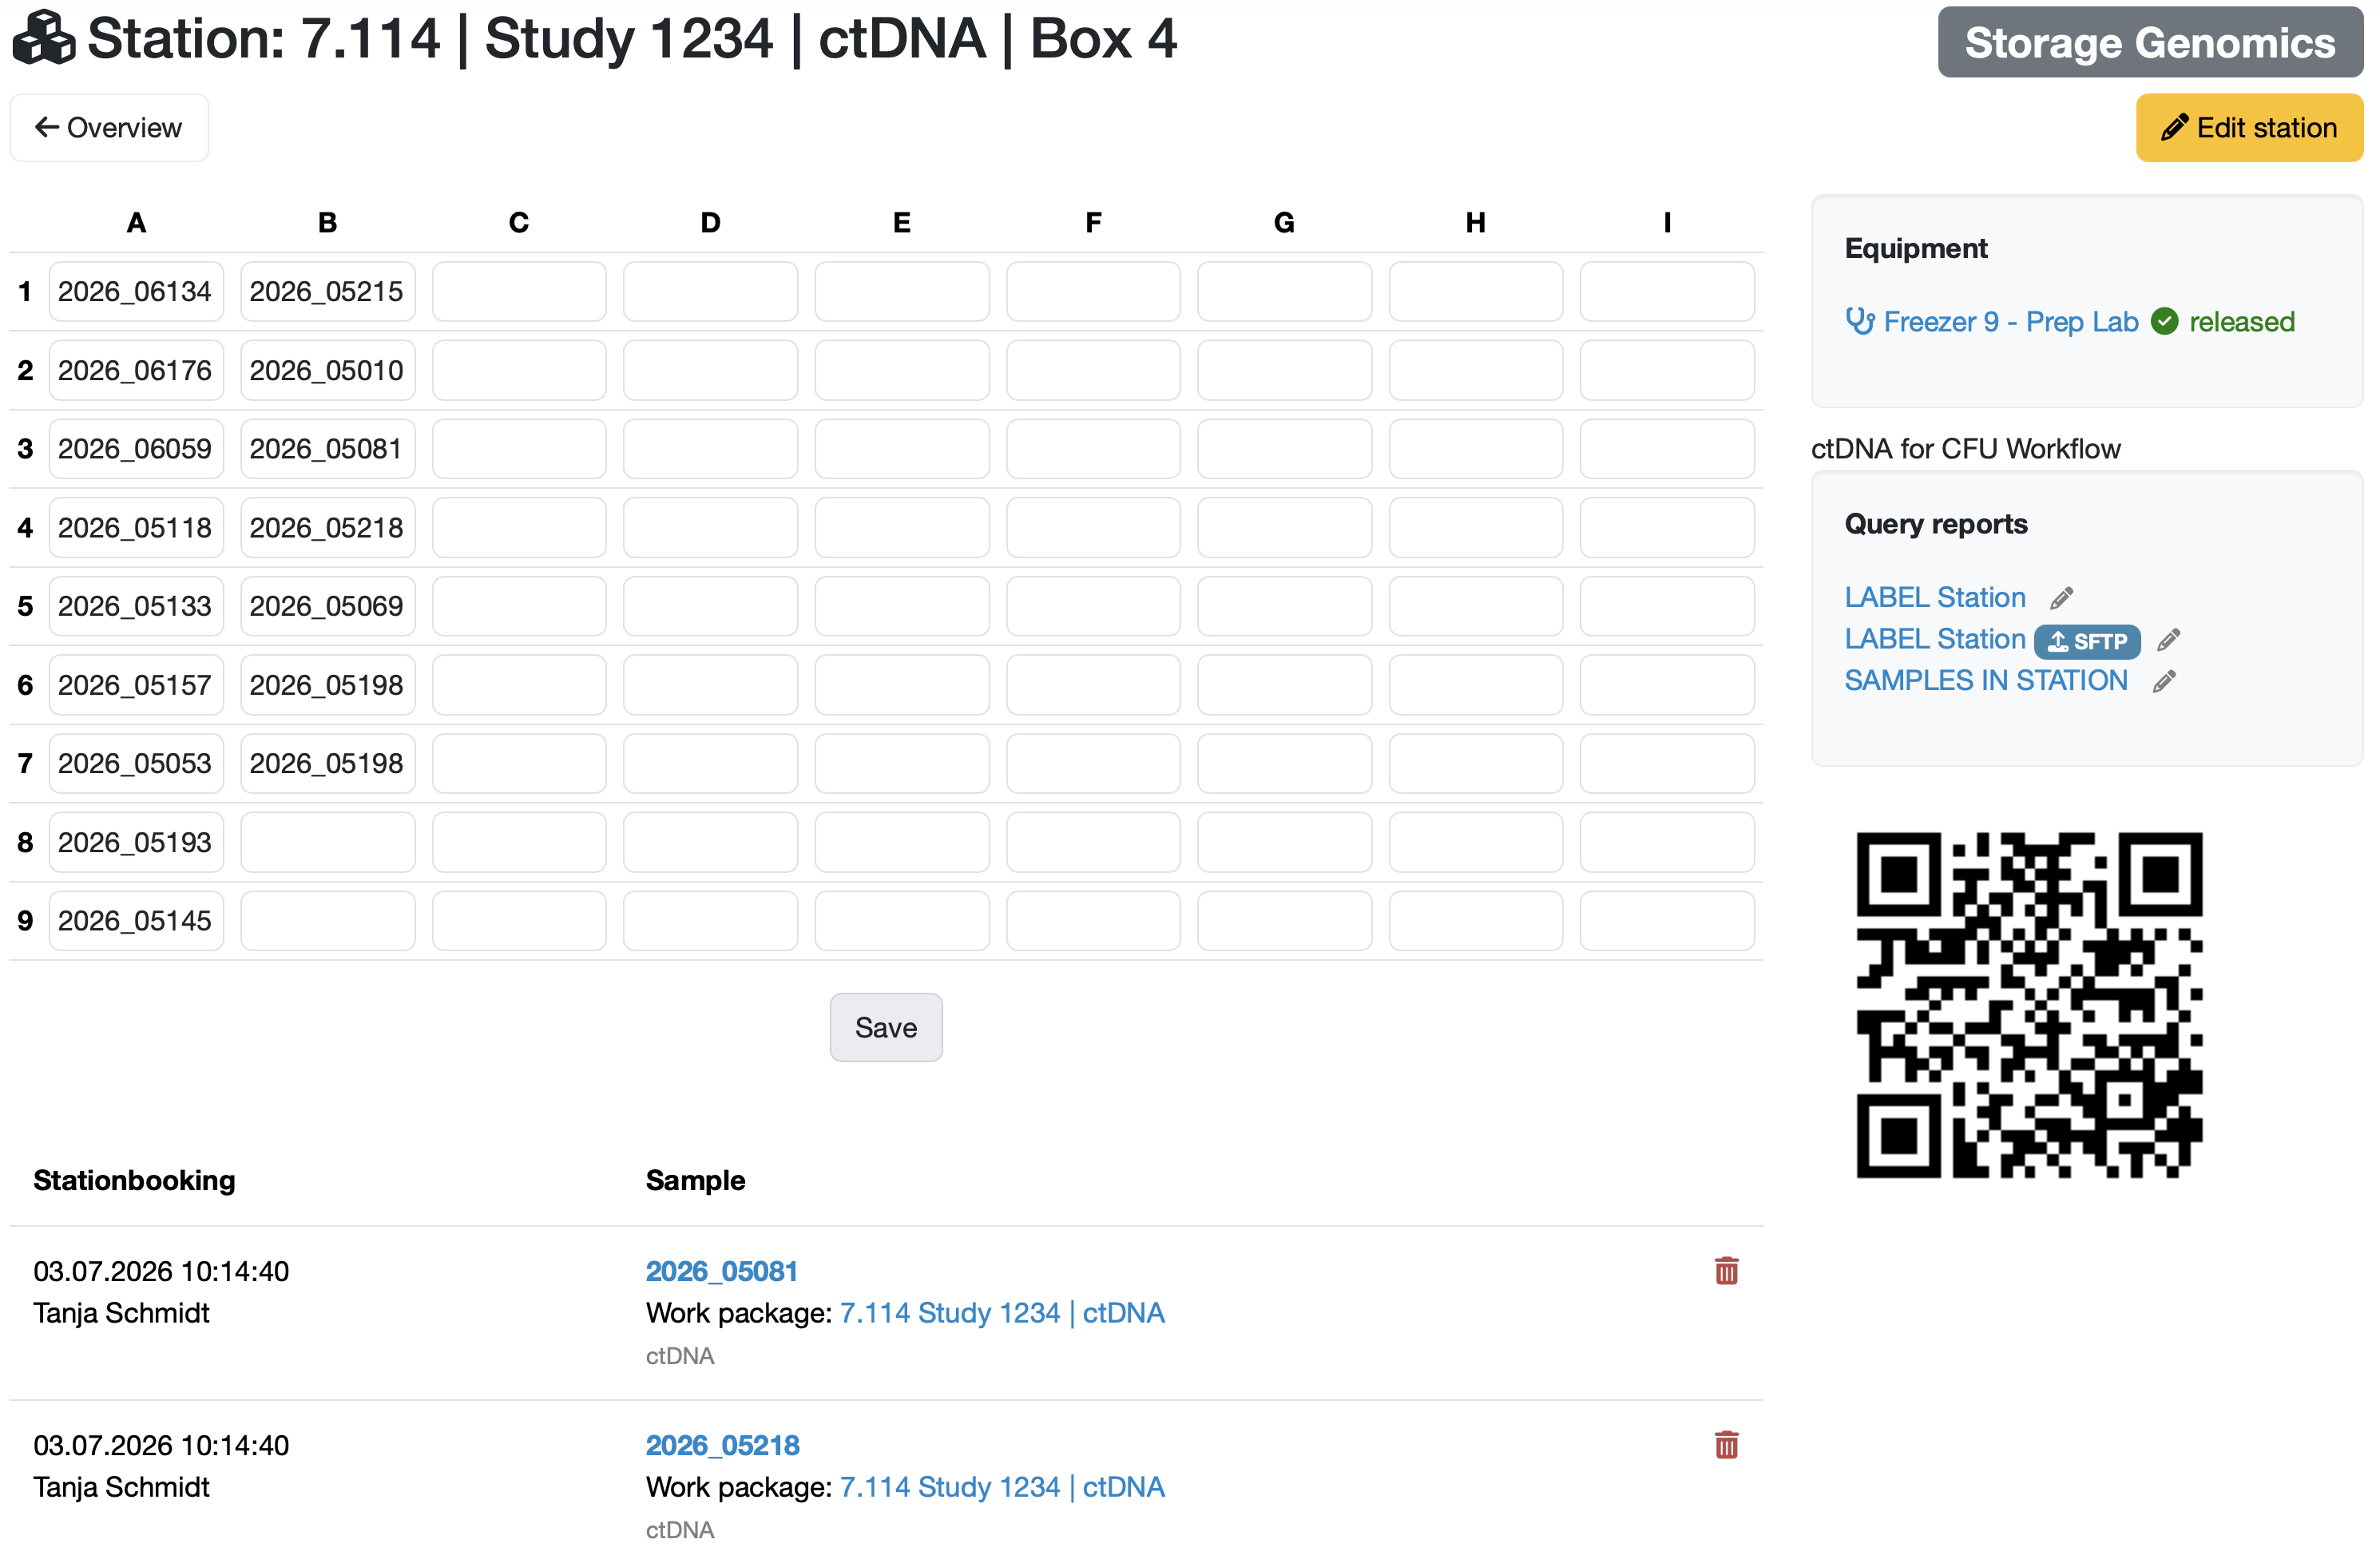
Figure: Station as a box (9x9) with booked-in samples, linked test equipment, and QR code
Note: Deleting a station removes the station and the associated bookings permanently.
Laatste wijziging: 21.08.2026
Algemeen
Leveranciersbeoordeling
Materiaal
Medewerkers
Klanten
Opdrachten
Monsters
PDF-sjablonen
Bijlagen
Recepten
Verslagen
Editor voor rapporttabellen
Interfaces
Kompetenzen
AI-functies
Inleidende fase
Analyses
Sjablonen
Klantenportaal (optioneel)
Aanbiedingen
Facturen
Parameters
Rekenwerk met parameters
Webservices
Transformatiecode
Controleplannen / Grenswaarden / Specificaties
Documentbeheer
Vragen en antwoorden
Testmiddelen
Opleidingen voor medewerkers
8D-rapport
Overige
Bestandsbeheer
Processen